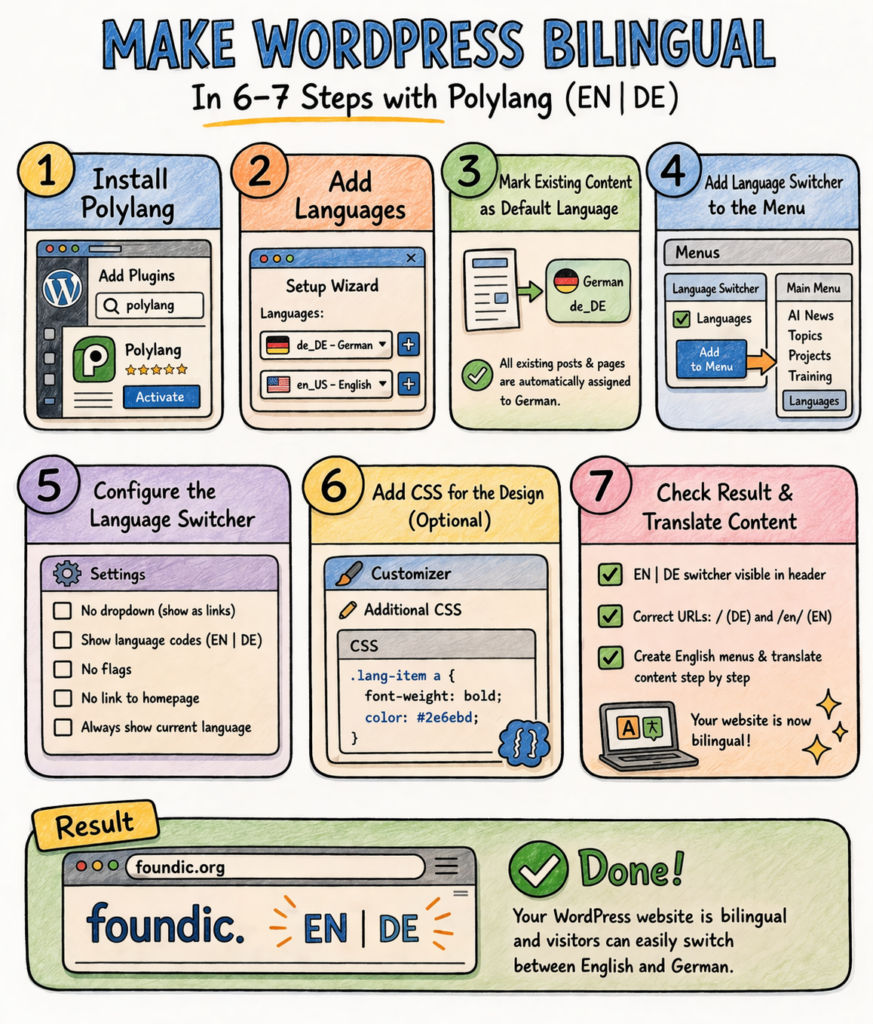
Your website speaks only German. Your visitors might not.
That’s not a problem, it’s a solvable problem. With Polylang, a free WordPress plugin, your site gets a second language. No expensive upgrade, no agency, no fresh start. Just one plugin, a few settings – and at the end, a small DE | EN switcher in the header that highlights the active language in bold and in your accent color.
This guide documents the live setup on foundic.org in March 2026 including everything that went wrong, how it was fixed, and what you won’t have to learn the hard way yourself.
To make this guide easier to follow, three characters accompany you:
The typical office archetypes: the competent IT colleague, the self-proclaimed expert, and the honest beginner. These three perspectives help you recognize common pitfalls.
Tanja is the IT expert. She knows how things work, explains patiently and methodically and doesn’t let bad advice rattle her. If you have a question, Tanja has the answer.
Bernd is the self-proclaimed “expert” who always thinks he knows better and is usually wrong. His shortcuts and half-knowledge regularly lead to problems. He represents all the dangerous myths and bad practices you should avoid.
Ulf is the learner, just like you. He asks the questions buzzing around in your head and sometimes needs a real-world comparison to understand IT. If Ulf doesn’t understand something, that’s perfectly fine – that’s what Tanja is there for.
“And… Action!”
It’s Monday morning. Bernd is standing at the whiteboard. In large letters it reads: “BILINGUAL – easy peasy.”
Bernd: “I just did it over the weekend. Two languages, ten minutes, done. What could possibly go wrong?”
Ulf: “And? Did it work?”
Bernd: “Well… the site was briefly offline. But that was the server.”
Tanja: “That wasn’t the server, Bernd. That was functions.php. But let’s start from the beginning.”
Which path do you take?
Structure of this guide: Parts 1–3 describe the universal standard Polylang setup – this works on any WordPress installation. From Part 4 onward, a project-specific solution for the Astra Free theme follows. Choose in advance which variant fits your setup:
| Variant | For whom | Effort |
|---|---|---|
| A – Standard (Parts 1–3) | Any WordPress setup; switcher appears on the right in the menu | Low, low maintenance |
| B – Astra Free centered (Parts 1–4) | Astra Free, DE|EN permanently visible and centered | Medium, manual HTML block |
| C – Developer solution | Dynamic switcher via theme hook or shortcode | High, no static HTML block |
Recommendation: For most readers, Variant A is the right starting point – low maintenance, dynamic, works on any theme. Variant B makes sense if you’re using Astra Free and want DE|EN permanently visible in the center of the header. Variant C is recommended for production sites with developer access and long-term maintenance.
This guide documents Variant B in full. Variant A is complete after Part 3. Variant C is briefly outlined at the end.
Starting Situation
Imagine your website is a well-organized office – everything labeled in German: all folders, all signs, all documents. Now international visitors arrive, and you want them to find their way around just as easily as German visitors.
That’s exactly what Polylang does: it gives your website a second floor – in English. Same structure, same navigation, but everything translated. And a small elevator button in the header – DE | EN – takes visitors to the right floor.
In this guide we’re working with foundic.org as an example. The site runs WordPress 6.9.4 with the Astra theme and is currently entirely in German. 53 posts, 4 pages – and not a single English word in the navigation.
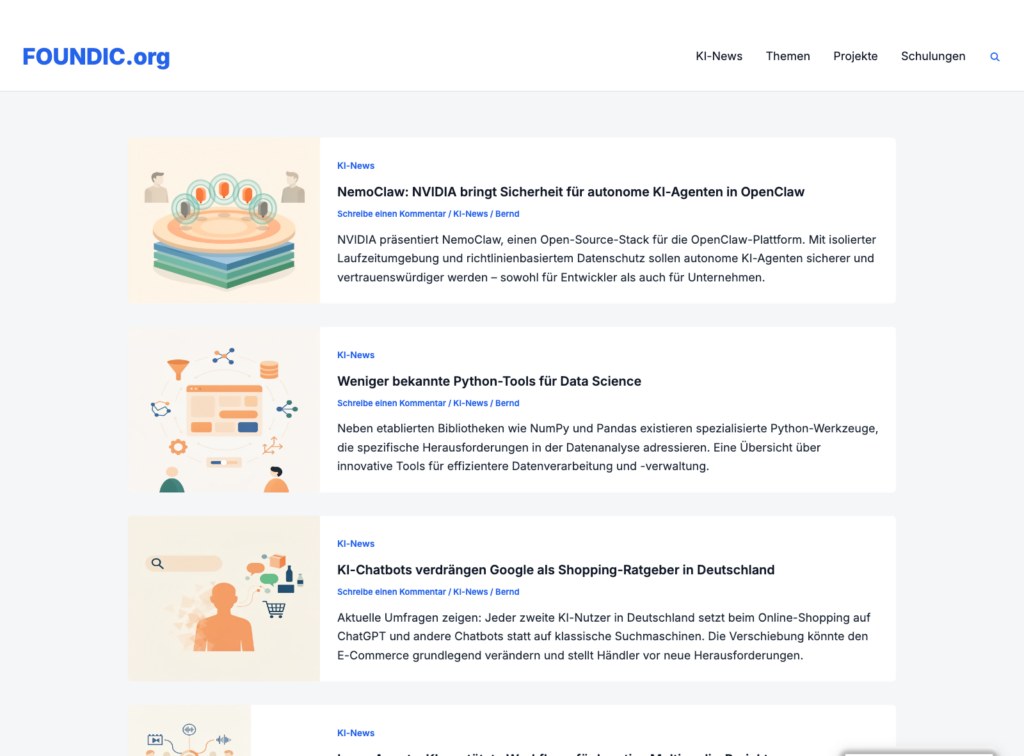
That’s about to change.
What You’ll Have at the End
- A working DE | EN language switcher in the header
- Separate navigation menus for German and English
- Correct URL structure:
foundic.org/for German,foundic.org/en/for English - Automatic browser language detection for new visitors
- A solid foundation on which you can gradually add English content
Prerequisites
Before we start: do you have all of this?
- WordPress installation with admin access
- A theme that supports menu positions (e.g. Astra)
- Access to the WordPress Customizer
- Optional but strongly recommended: a hosting backup – more on this in the troubleshooting chapter
Ulf: “Backup? What for? I’ll just undo it if something goes wrong.”
Tanja: “Ulf, WordPress doesn’t have an undo button for broken PHP files.”
Bernd: “I don’t need backups. I don’t make mistakes.”
Tanja: “Bernd, last month you overwrote half the database.”
Bernd: “That was an experiment.”
Take the backup. It takes two minutes and might save you from a very unpleasant hour.
Part 1: Install Polylang
Ulf: “Polylang – sounds like a football club from Poland.”
Tanja: “It’s the most widely used multilingual plugin for WordPress. 800,000 active installs, 4.5 stars. Free.”
Bernd: “I would have just manually changed the texts on the site to English. Much simpler.”
Tanja: “Then you wouldn’t have any German texts left.”
Bernd: “True. Bad idea.”
Polylang is like a translator who sits permanently in the background of your website. Every piece of content – posts, pages, menus, widgets can be managed in two languages simultaneously. German visitors get the German version, English visitors get the English version. One WordPress installation, one database, two languages.
Step 1: Go to Plugins → Add New Plugin and search for “Polylang”. Install the plugin and activate it immediately.
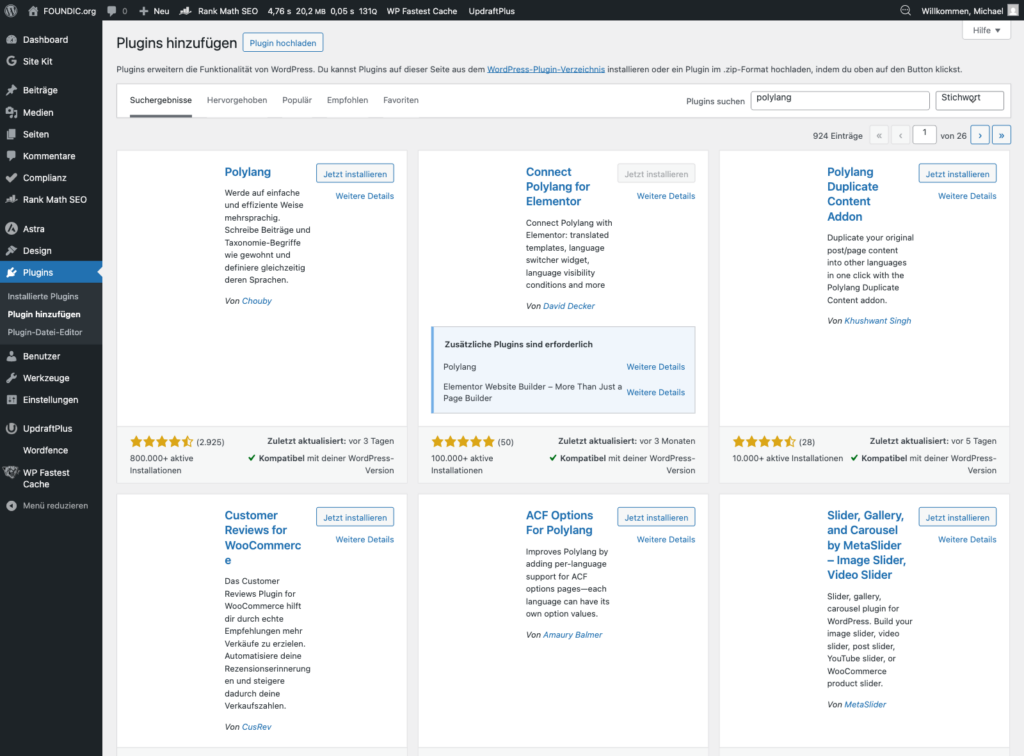
After you click “Activate”, Polylang starts its setup wizard on its own. Do not dismiss it – it walks you through the first settings that matter.
Part 2: Run the Setup Wizard
After activation, Polylang starts a setup wizard. This walks you through the essential settings in four steps.
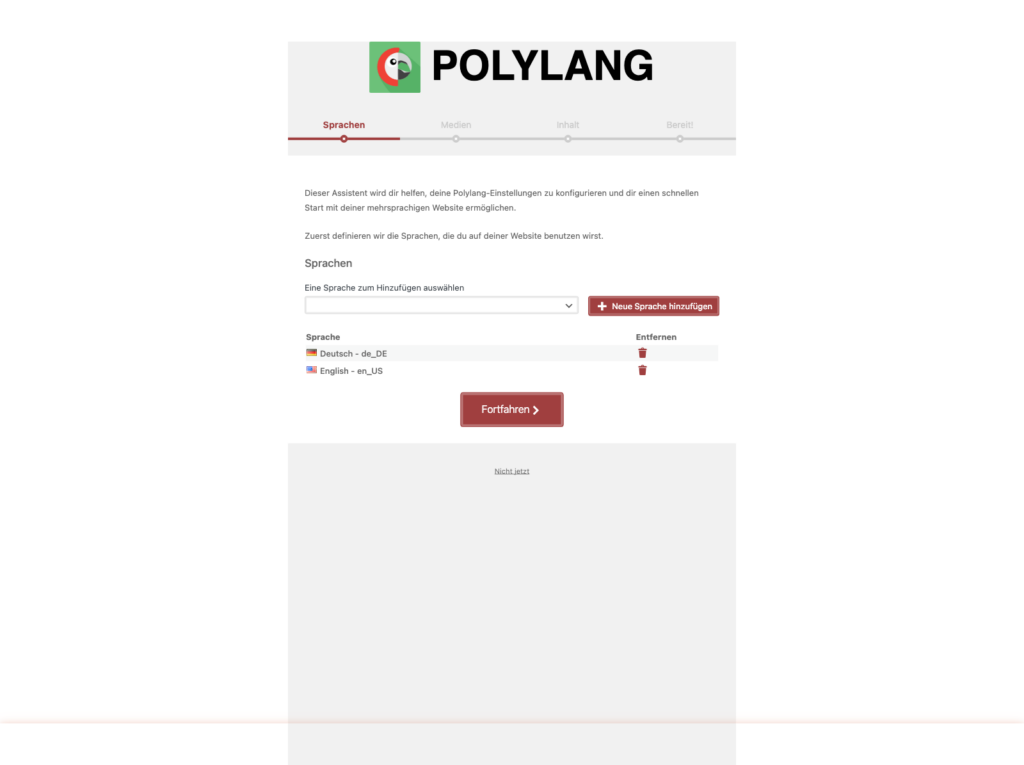
The wizard runs through four steps: Languages → Media → Content → Ready! Think of it as filling in a settings form on your first day at a new job – four pages, and then you can get going. The questions are easier than a tax return.
Step 2: In the wizard, click “Continue” to reach the language selection. Add German (de_DE) and English (en_US). German should be set as the default language.
Ulf: “Why de_DE and not just German?”
Tanja: “Because there are several variants – German from Germany, from Austria, from Switzerland. The code tells the system exactly which one you mean. Like in football: FC Bayern is not the same thing as FC Bayern’s reserve side.”
Ulf: “Ah. Okay. That makes sense.”
Step 3: The wizard asks about media. Leave the toggle switched off – that is the default – and click “Continue”. Polylang then does not create separate translations for media files. This saves storage space and avoids duplicate images.
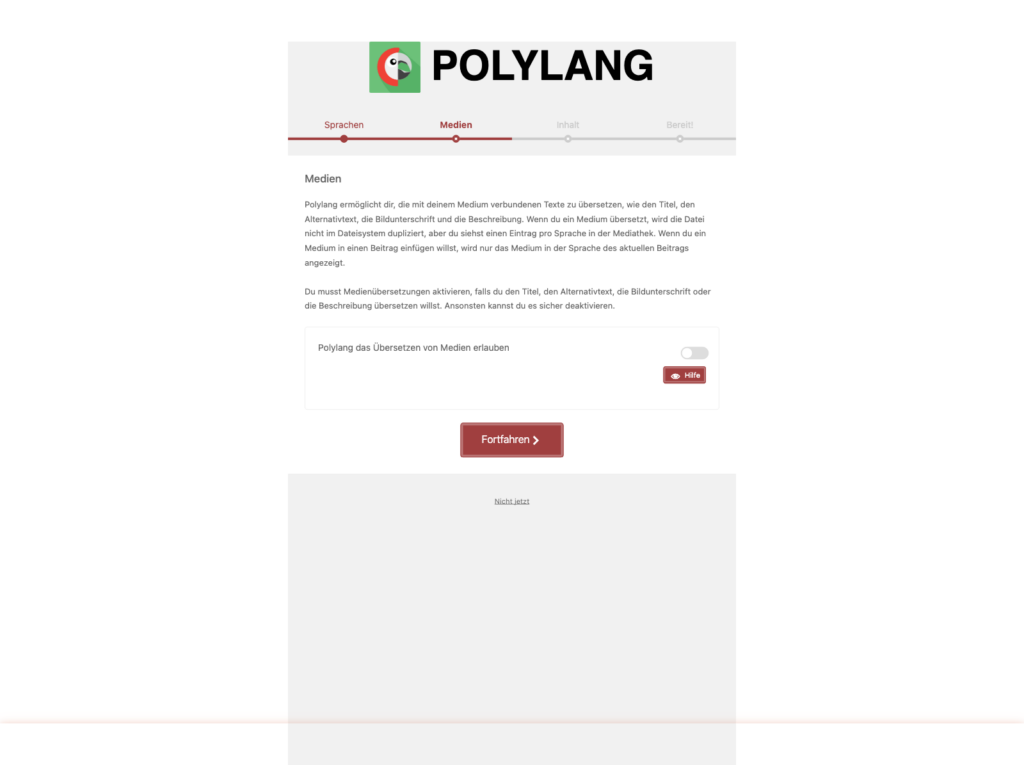
What does that mean in practice? Your images stay exactly as they are – one image in the media library, used in both language versions. You would only switch this on if you wanted to show different images with English text on the English side.
Polylang now discovers that you already have 53 posts and 4 pages – and that not one of them is assigned to a language yet. It is like an office full of unlabelled folders: they exist, but nobody knows which department they belong to.
Select “German – de_DE” – it is preselected – and click “Continue”. Polylang assigns German to every existing post and page. That is the basis for creating English translations later and linking them to the German originals.
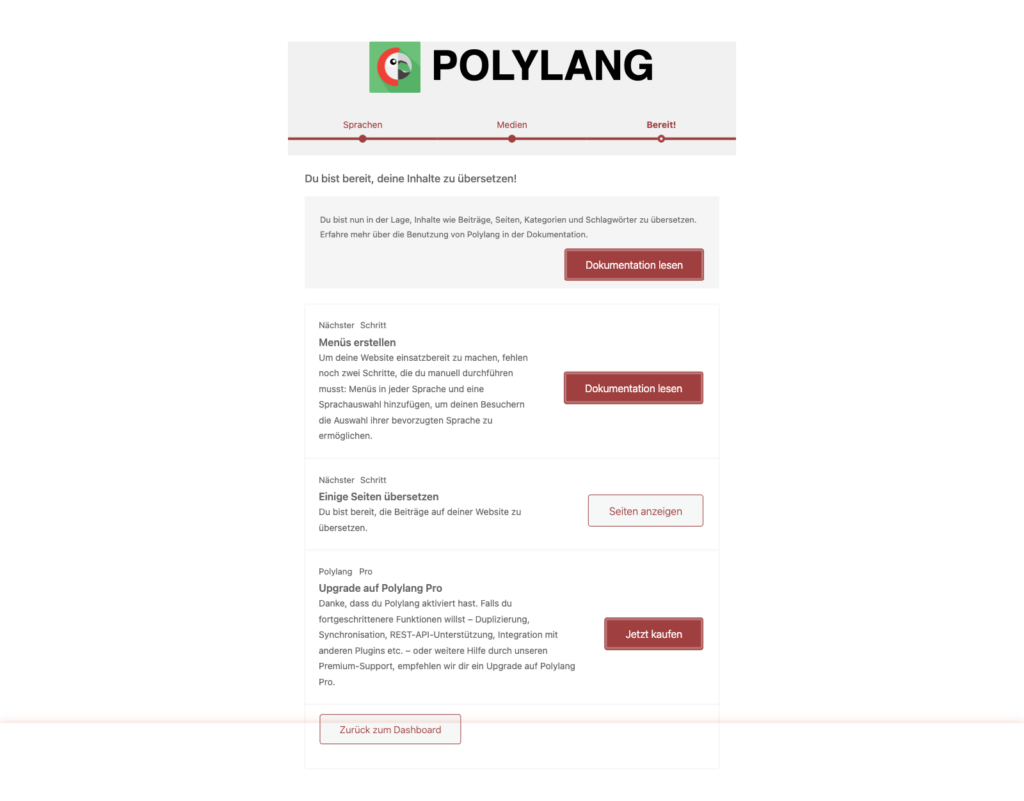
Step 4: Click “Start” to complete the wizard. Polylang now marks all existing posts and pages as “German” in the background. This can take a moment on larger sites.
Bernd: “Can I just set them all to English? Then I don’t have to translate anything.”
Tanja: “Then your German articles would be filed as English content. Google would notice, and you would have an SEO problem.”
Bernd: “Ah, I see.”
Tanja: “Always German. You can create the English versions afterwards.”
Ulf: “What happens to all my existing posts now?”
Tanja: “They stay exactly as they are – just now officially marked as German. Nothing gets deleted or moved.”
Bernd: “I once skipped a wizard like that. Nothing happened.”
Tanja: “Because you were lucky. The wizard sets URL rules that Polylang needs to route languages correctly. Skip it and you’ll get 404 errors.”
Polylang is now active. What is still missing is the language switcher that visitors can actually see and click. We build that in Part 3.
Part 3: Set Up the Language Switcher in the Menu
Now it becomes visible. Until this point Polylang has worked quietly in the background. Now your website gets its first public sign: “Hey, there are two languages here.”
The language switcher is like the little label next to the lift button. Small, unremarkable – but without it nobody finds their way to the second floor.
Ulf: “How do visitors switch between the languages?”
Tanja: “Polylang adds a language switcher to your menu. It looks like a regular menu item and links to the translated version of the current page.”
Bernd: “Can’t you just put two links in the header? DE and EN, done.”
Tanja: “You could. But then those links always point to the homepage, not to the translated version of the current article. We’ll look at that approach in Part 4.”
Step 5: Go to Appearance → Menus. Open your main menu. Under “Add menu items” on the left, find the “Language Switcher” section and expand it. Click “Add to menu”.
Step 6: The language switcher now appears as a menu item at the bottom. In the item’s settings, configure the options:
| Option | Setting | Reason |
|---|---|---|
| Display as dropdown | ☐ off | Links instead of dropdown |
| Display language names | ☐ off | No “Deutsch”/”English” – abbreviation is enough |
| Show flags | ☐ off | No flags, text only |
| Force link to home page | ☐ off | Switcher should point to the same article |
| Hide current language | ☐ off | Both languages always visible |
| Hide languages with no translation | ☐ off | Prevents additional hiding of available language options |
Ulf: “Why no flags? Flags are cool. There are flags at the stadium too.”
Tanja: “Because flags stand for countries, not for languages. English is not only the UK. Austrians speak German and may not appreciate a little German flag.”
Bernd: “I would have just used flags and waited to see if anyone complained.”
Tanja: “That is not an approach, Bernd.”
Important: WordPress confirms the save with “Main menu has been updated.” in the green banner at the top of the page.
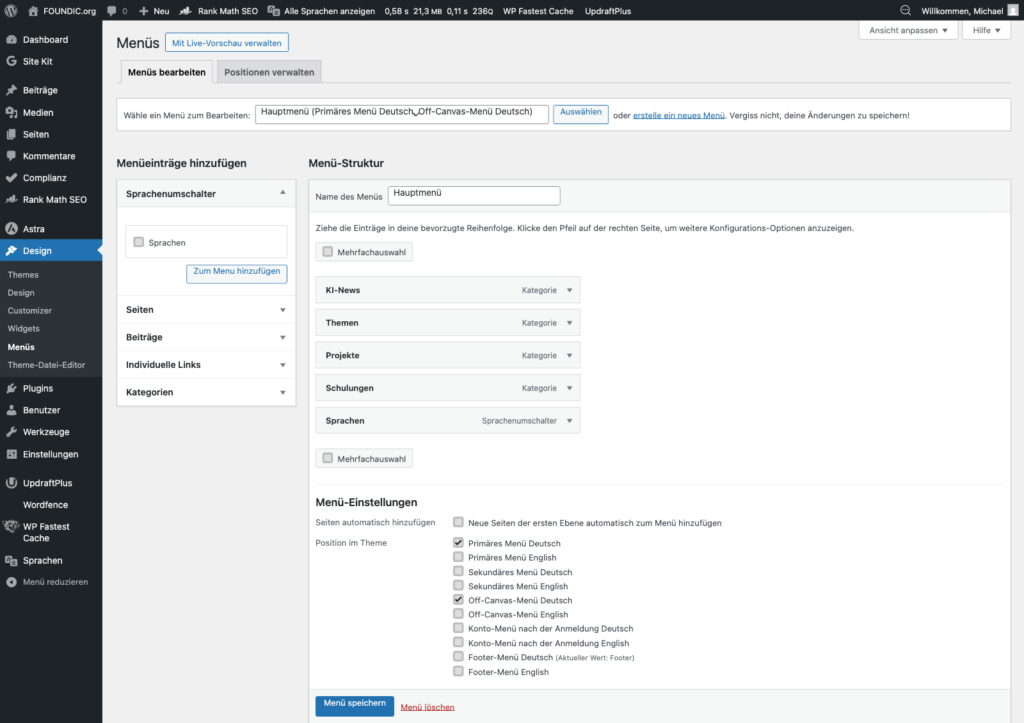
Step 7: Save the menu. In the frontend you’ll now see DE and EN in the navigation. Click EN – you land on the English homepage (currently still empty, but the URL /en/ is correctly created).
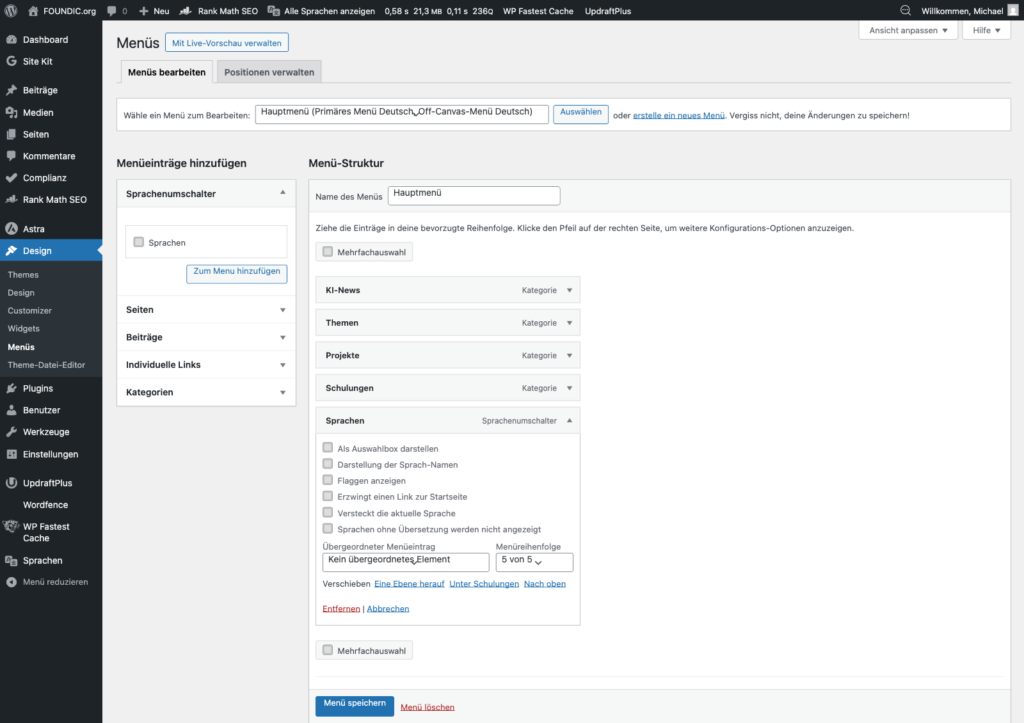
Now for the cosmetics. By default Polylang shows the language switcher with the full language name – “Deutsch” and “English”. That is too long and not elegant enough. What we want is DE | EN: compact, clear, modern.
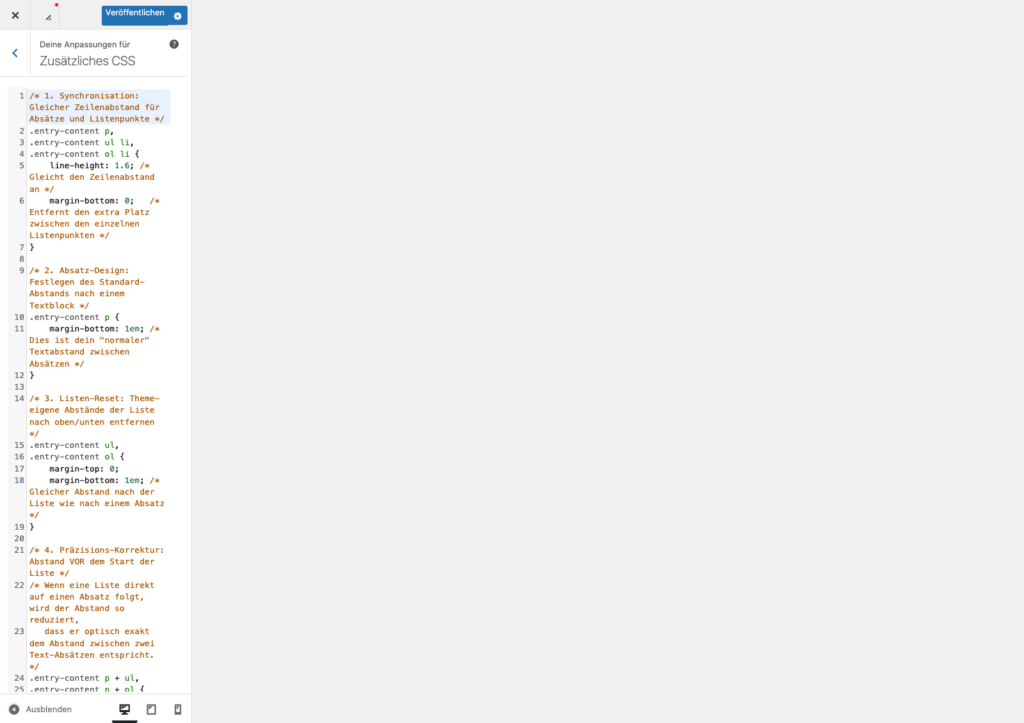
That is done with CSS, the styling language of the web. No need to invent anything here – just copy the finished code. The Customizer opens with the CSS editor on the left and a live preview on the right; append the code to the end of the CSS that is already there.
Step 8 (Variant A only): If you want to style the language switcher, add this CSS under Appearance → Customize → Additional CSS:
/* ===== Language switcher DE | EN ===== */

/* Hide the original text */
.lang-item a {
    font-size: 0 !important;
    color: #666;
    text-decoration: none;
    padding: 0 3px;
}

/* Show the language codes via pseudo-element */
.lang-item.lang-item-de a::after { content: "DE"; font-size: 13px; }
.lang-item.lang-item-en a::after { content: "EN"; font-size: 13px; }

/* Separator | between the languages */
.lang-item + .lang-item::before {
    content: "|";
    color: #ccc;
    font-size: 13px;
    margin-right: 2px;
}

/* Active language: bold + accent colour */
.lang-item.current-lang a::after {
    font-weight: bold;
    color: #e8691e;
}
Adjusting the colour: #e8691e is the accent colour of foundic.org. Replace that value with the hex code of your own site colour. You will usually find it in the theme settings under “Primary colour”.
This CSS hides the original link text and replaces it with the language abbreviation via a pseudo-element. The active language is displayed in bold and in the accent color.
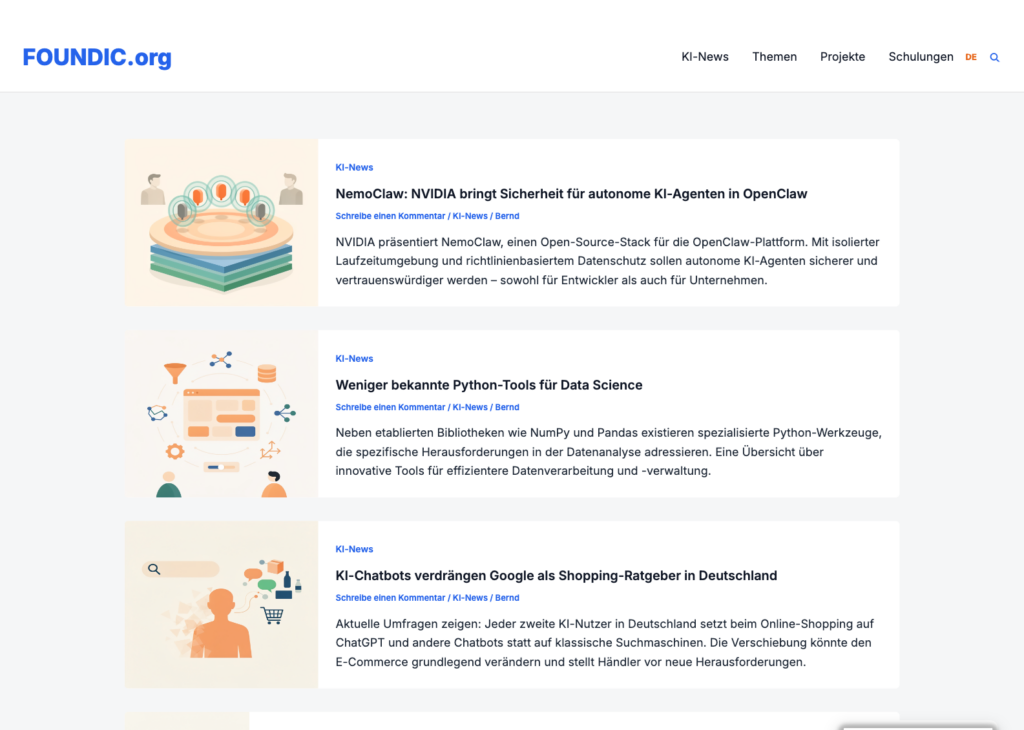
Step 9: Test the result. Switch between DE and EN. The switcher should work correctly – on article pages it links directly to the translated version, not just to the homepage.
In the header the language switcher is now visible – DE appears on the right of the menu, in orange and bold. EN is still grey and inactive, because there is no English content yet. That is the first working milestone.
Variant A complete. If you’re using a different theme than Astra Free, or if the switcher appears correctly in the menu, you can stop here. Parts 4 and 5 are only relevant for Astra Free with centered switcher.
Up to here: the standard Polylang setup is complete. What you have now is a working language switcher in the menu, on the right of the navigation, which shows EN automatically as soon as an English translation of the current page exists. That is the official Polylang route – and enough for a lot of websites.
When is that enough?
- You only want a working language switcher: → you are done, skip Part 4
- You want EN always visible, even without translations: → Part 4 is needed
- You want the switcher exactly in the middle of the header on Astra Free: → Part 4 is needed
The steps that follow are project-specific, aimed at one goal: DE | EN permanently visible and centred in the Astra Free header.
At this point, a comparison of the two main approaches:
| Variant | Advantage | Disadvantage |
|---|---|---|
| Polylang menu switcher | Dynamic, low maintenance, works automatically | Hides EN when no translation exists |
| Custom HTML in header | DE|EN always visible, full control | Links are hard-coded – must be updated manually on domain change, staging, or subdirectory installs |
Part 4: Language Switcher Centered – Astra Free
Variant B solves a concrete layout problem elegantly: DE | EN stays permanently visible in the header – whether or not a translation already exists for the current page. That gives the site a bilingual appearance from day one, even while the content is still being built.
Who is Variant B best suited to? Corporate and brand websites, where the visual appearance takes priority and the language switcher should be visible from day one. For editorial sites with many articles, where readers should reach the translated version of the current article in a single click, Variant A or C is the more robust choice.
Ulf: “The switcher is in the menu on the right. Can it go in the middle of the header?”
Tanja: “Yes. But Astra Free makes that harder than it sounds. The center column of the header can become invisible under certain conditions. We’ll fix that with CSS.”
Bernd: “I’d just put it in the footer.”
Tanja: “Bernd, nobody looks in the footer for language switching.”
Problem 1: The EN link is missing from the language switcher
At first the menu shows only German – the EN link is missing entirely.
This is not a bug, it is correct Polylang behaviour. Polylang only shows a language in the switcher when a translation of the currently displayed page exists in that language. Since no English content has been created yet, EN stays invisible.
The solution: replace the Polylang menu switcher with your own HTML widget in the Astra Header Builder – one that always shows DE and EN, whether or not translations exist.
Trade-off: Polylang switcher vs. your own HTML widget
| Option | Advantage | Drawback |
|---|---|---|
| Polylang menu switcher | Dynamic, low-maintenance, works automatically | Hides EN whenever no translation exists |
| Your own HTML in the header | DE | EN always visible, full control | The links are hard-coded – after a domain change, or on a staging or subdirectory installation, they have to be adjusted by hand |
We go with the HTML widget here because DE | EN is meant to be permanently visible. Keep this in mind: if you move to a different domain or set up a staging environment, you have to update the links in the widget yourself.
Problem 2: The language switcher should sit in the middle of the header
The Polylang menu item appears at the far right of the navigation. What we want is a position in the middle of the header – between the logo on the left and the menu on the right.
Picture the header as a football pitch: the goalkeeper stands on the left (the logo), the team attacks on the right (the menu). The language switcher is meant to be the sweeper in the middle – always present, elegantly placed.
Because Astra Free does not allow free positioning in the Header Builder, we reach for a CSS trick: position: absolute. That sounds more dangerous than it is.
Step 10: Go to Appearance → Customize → Header → Header Builder. The Header Builder shows the visual layout with three zones: left (logo), centre (empty) and right (primary menu).
A note for Astra Free: the HTML 2 widget can only be dragged into the left zone – the centre zone is locked in the free version. We achieve the visual centring with CSS instead.
Drag the “HTML 2” element from “Available widgets” into the header (left zone). Clicking the widget opens a WYSIWYG editor – a simple text field with formatting buttons.
Step 11: In the HTML element, enter the following code:
<nav class="pll-switcher-center">
  <a href="https://www.your-domain.com/" class="pll-link-de" hreflang="de">DE</a>
  <span class="pll-sep">|</span>
  <a href="https://www.your-domain.com/en/" class="pll-link-en" hreflang="en">EN</a>
</nav>
Adjust the URLs: replace your-domain.com with your own domain.
A technical quirk: the WYSIWYG editor automatically adds a <br> tag after each element. That looks odd at first, but it is not a problem – the CSS in the next step suppresses those line breaks again.
Important – how it behaves on subpages: this HTML switcher is a static widget. Its links always point to the two front pages (/ and /en/), no matter which article the visitor happens to be reading. So somebody who clicks EN while reading a German article first lands on the English front page, not on the English translation of that article.
For the front page and for simple navigation that is good enough. If you need article-level switching – click EN and go straight to the English version of the same article – use the native Polylang menu switcher instead (Variant A), or a dynamic solution via a theme hook (Variant C). The native Polylang switcher needs less maintenance and handles this case on its own.
Replace your-domain.com with your actual domain. This creates a static language switcher with two links – DE points to the German homepage, EN to the English homepage.
Step 12: Now add the full CSS for the centered switcher. Go to Appearance → Customize → Additional CSS. Replace or extend the CSS from Step 8 with the complete version:
/* ===== Language switcher DE | EN (centered) ===== */

/* DE|EN as a flex row, suppress br tags */
.pll-switcher-center {
    display: flex !important;
    flex-direction: row !important;
    align-items: center;
    gap: 6px;
    margin: 0; padding: 0;
}
.pll-switcher-center br { display: none !important; }

/* Language links */
.pll-switcher-center a,
.pll-switcher-center .pll-sep {
    font-size: 13px;
    font-weight: normal;
    color: #888;
    text-decoration: none;
    line-height: 1;
}

/* Active language bold + orange */
html[lang="de-DE"] .pll-link-de,
html[lang="de"] .pll-link-de { font-weight: bold; color: #e8691e !important; }
html[lang="en-US"] .pll-link-en,
html[lang="en"] .pll-link-en { font-weight: bold; color: #e8691e !important; }

/* HTML 2 widget absolutely centered in the header */
.ast-header-html-2 {
    position: absolute !important;
    left: 50% !important;
    top: 50% !important;
    transform: translate(-50%, -50%) !important;
    z-index: 5;
    white-space: nowrap;
}
.site-primary-header-wrap { position: relative !important; }

/* Hide the Polylang menu item (replaced by HTML 2) */
.lang-item { display: none !important; }
What these CSS rules actually do, in plain language:
.pll-switcher-center { display: flex }– stops the br tags from stacking DE and EN on top of each other. Flex turns a vertical stack into a horizontal row.html[lang="de-DE"] .pll-link-de– recognises the active language from thelangattribute that WordPress writes into the<html>tag automatically. No JavaScript needed..ast-header-html-2 { position: absolute }– lifts the widget out of its normal place in the left zone and positions it exactly in the horizontal and vertical centre of the header.translate(-50%, -50%)corrects the offset caused by the element’s own dimensions..lang-item { display: none }– hides the old Polylang menu item, which would otherwise still show “German” in the menu on the right.
Bernd: “Position absolute? That’s a hack. Real developers don’t do it that way.”
Tanja: “Real developers take the solution that works. With Astra Free this is the only option without a paid upgrade.”
Ulf: “Is that like a coach improvising tactically because the centre forward is injured?”
Tanja: “Perfect comparison.”
Step 13: For mobile devices, the HTML widget in the header is sometimes hidden by the hamburger menu. Add this CSS to ensure it’s hidden on mobile and the native Polylang switcher in the menu takes over instead:
/* Desktop: hide the Polylang menu item, HTML widget visible */
.lang-item { display: none !important; }

/* Mobile: hide the HTML widget, show the Polylang menu item again */
@media (max-width: 768px) {
    .ast-header-html-2 { display: none !important; }
    /* Restore the theme default rendering of the menu item -
        depending on the theme, list-item, block or inherit may be a better fit */
    .lang-item { display: list-item !important; }
}
Step 14: Publish the changes in the Customizer. Check in the frontend: DE|EN should appear centered in the header. The active language is displayed in bold and in the accent color.
- Left: logo
- Centre: DE | EN (centred)
- Right: main navigation
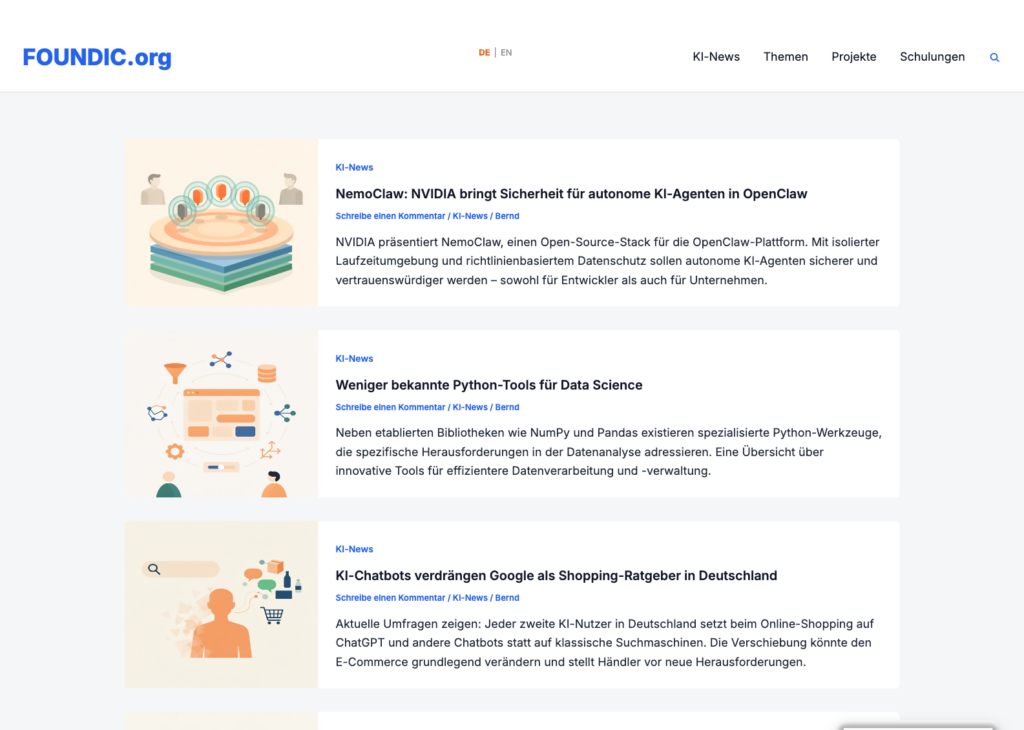
That is Variant B – permanently visible, cleanly centred, visually unambiguous.
Check it on small screens too: absolute positioning works very well on the desktop, but on narrow viewports it can overlap the logo or the menu. That is what the CSS in Step 13 is for: on the desktop the HTML widget stays centred in the header, on mobile it is hidden and the native Polylang switcher takes over inside the off-canvas menu. For that to work, do not remove the Polylang menu switcher from the main menu – only hide it on the desktop.
This way the visitor has a working language switcher on every device: centred and always visible on the desktop, integrated into the burger menu on mobile. The exact display value can vary with the theme’s menu structure; if in doubt, use the browser developer tools to check which value is the theme default.
The menu structure overview after Part 4:
| German | English |
|---|---|
| KI-News | AI News |
| Themen | Topics |
| Projekte | Projects |
| Schulungen | Training |
URL structure after Parts 1–4:
| Language | URL | Menu items |
|---|---|---|
| German | your-domain.com/ | KI-News · Themen · Projekte · Schulungen |
| English | your-domain.com/en/ | AI News · Projects · Topics · Training |
Part 5: Set Up the English Menu
Ulf: “On the English homepage – the menu still shows the German categories.”
Tanja: “Polylang manages separate menus per language. We need to create an English menu and assign it.”
Bernd: “Can’t you just rename the existing menu?”
Tanja: “Then you’d lose the German menu. We need a second, independent menu.”
Step 15: Go to Appearance → Menus → Create a new menu. Name it “Main Menu English”. Under “Menu settings” at the bottom, select the language “English”.
Step 16: Add the same menu items as in the German menu – but in their English names. For foundic.org, that looks like this:
| German | English |
|---|---|
| KI-News | AI News |
| Themen | Topics |
| Projekte | Projects |
| Schulungen | Training |
Important: Add only English categories or pages here. If a category only exists in German, create an English translation for it first (under Posts → Categories → edit category → enter the English name in the Polylang language field).
Step 17: At the bottom of the menu settings, also add the Polylang language switcher to this menu (as in Steps 5–6). This ensures that on English pages, DE and EN are displayed correctly in the menu.
Step 18: Go to the “Manage locations” tab. Assign the English menu to the menu positions:
- Primary Menu English → Main Menu
- Off-Canvas Menu English → Main Menu (for the mobile hamburger menu)
Step 19: Save. Clear the cache if you have a caching plugin active.
Step 20: Test: Navigate to the English homepage (your-domain.com/en/). The navigation should now show the English menu items. Click DE|EN in the header – the switch should work.
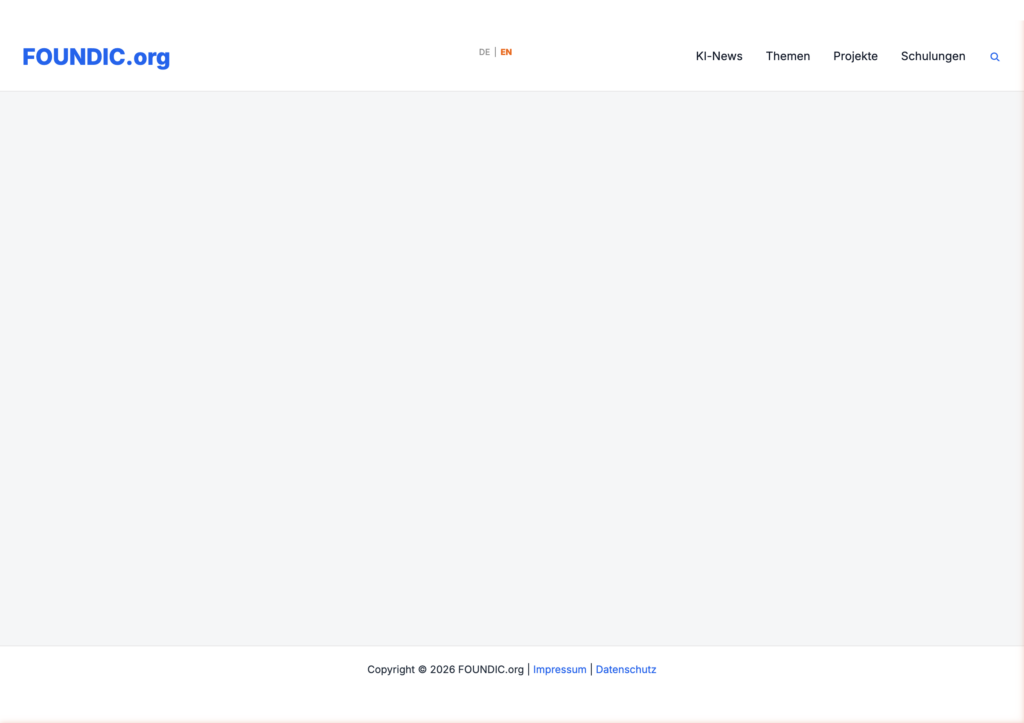
Ulf: “The EN link in the switcher leads to the English homepage, not to the English version of the article.”
Tanja: “That’s the Variant B behavior. The HTML widget always points to the homepage. For article-specific switching, the native Polylang switcher in the menu must also remain active. Both can coexist.”
Bernd: “I’d just show both. DE menu left, EN menu right.”
Tanja: “Bernd, that would be two full menus in the header.”
Bernd: “Bold design choice.”
Step 21: Optional check: switch to the English page and look at the source code (Ctrl+U). You should find these lines in the <head>:
→ <link rel="alternate" hreflang="de" href="https://your-domain.com/"/>
→ <link rel="alternate" hreflang="en" href="https://your-domain.com/en/"/>
These hreflang tags tell Google: “This page also exists in English/German, and here is the link.” Essential for international SEO.
Step 22: Clear cache again and test in incognito mode (without login cookie).

Part 6: Browser Language Detection
So far the visitor has to click DE or EN themselves. That works. But it would be better still if the site showed the right language automatically on the very first visit – based on the visitor’s browser language.
Ulf: “Can the site automatically detect whether someone uses English or German?”
Tanja: “Yes. Polylang has a built-in feature for that. But it has a few caveats.”
Bernd: “That sounds like it could go wrong.”
Tanja: “It can. That’s why we set it up carefully.”
Step 23: Go to Polylang → Settings. On the “Language” tab, activate the option “Detect browser language”. Save.
What happens: on the first visit to the front page, Polylang reads the browser’s Accept-Language header and forwards the visitor to the matching language version. Only on that first visit – after that a cookie remembers the choice.
One more refinement: by default Polylang only redirects when the browser language matches one of the site languages exactly. A visitor with a French browser would therefore land on German – the default language – and not on English. For most international sites English is the sensible fallback for every non-German language, and a small PHP snippet takes care of that.
Step 24: Now configure the fallback behavior: if a visitor’s browser language doesn’t match any configured language (e.g. French, Spanish, Chinese), they should land on the English homepage by default. For this, add the following PHP snippet via Plugins → Code Snippets → Add New:
Set it up through the “Code Snippets” plugin – safer than editing functions.php, more on that in Part 8:
- Install the plugin: Plugins → Add New Plugin, search for “Code Snippets” and install it
- In the backend: Snippets → Add New
- Settings – Title: Polylang: redirect unrecognised browser languages to English. Type: PHP. Location: run on the front end only
- Paste the code below, then activate and save the snippet
add_filter( 'pll_preferred_language', 'foundic_language_fallback' );
function foundic_language_fallback( $slug ) {
    if ( false === $slug ) {
        return 'en';
    }
    return $slug;
}
Activate the snippet and save.
What does this code do? Polylang passes the detected browser language to the filter function. If no matching language was found, Polylang returns false. The snippet catches exactly this case and returns 'en' instead – i.e. English.
| Browser language | Behavior |
|---|---|
de, de-DE, de-AT | → German homepage ✅ |
en, en-US, en-GB | → English homepage ✅ |
fr, es, it, zh, … | → English homepage (fallback) ✅ |
Note: Only applies to first-time visitors without a set pll_language cookie. Returning visitors keep their last selected language. Logged-in admins are never redirected.
What you should consider: the fallback to English for all non-DE languages is a product decision, not a technical necessity. Think about whether this makes sense for your target audience – for a German-language community site, for example, German as the fallback might be better. Also: browser language and user preference are not always the same. Someone with a German browser who prefers English still lands on German. And with aggressive redirect setups, search engine crawlers and CDN systems can show unexpected behavior – check after activation whether Google Search Console reports any crawling errors.
Recommendation: For starters, go live without browser language redirect. First build up content in both languages, test the switcher manually, and only activate automatic detection afterward. For small blogs or community sites with a clearly German-speaking audience, browser redirection is often not necessary at all. For international SEO setups with Google traffic from multiple countries it can be useful – but then set it up with curl testing and Search Console monitoring.
Step 25: Test: open an incognito tab. Set your browser language to English if needed. Navigate to your homepage – you should be redirected to /en/.
Step 26: If browser language detection is active and your site has a caching plugin, you need to exclude the homepage from the cache. Otherwise the cache delivers the same version to all visitors, regardless of browser language. In WP Fastest Cache: go to WP Fastest Cache → Exclude and add a rule for the homepage (/).
Why this matters: WP Fastest Cache stores the front page as a static HTML file. If that cached file is delivered straight to the visitor, no PHP runs at all – and the Polylang redirect is PHP code, so it never executes. Every visitor then sees the default language. After you add the rule, clear all caches: WP Fastest Cache → Delete all caches.
The same applies to other caching plugins: any caching plugin that produces static HTML files has to be switched off for the front page. Otherwise browser language detection will not work.
Part 7: Translate Content to English
The technical setup is now fully complete. Tanja leans back. Ulf looks like he just scored a goal. Bernd has quietly been drinking his coffee.
Ulf: “And now?”
Tanja: “Now comes the work.”
Bernd: “Can’t you just let it auto-translate?”
Tanja: “You can. You shouldn’t for technical content. But that’s your decision.”
Translate a post:
- Open a post in the backend: Posts → All Posts
- The Polylang “Languages” field appears on the right in the sidebar
- Click “+” next to the ð¬ð§ icon
- A new editor opens for the English version
- Write the post in English and publish it
Polylang automatically links both versions and sets the correct hreflang tags for Google – these are hints in the page source that tell Google: “This page also exists in English, and here is the link.” Important for international SEO.
Translate a page:
For pages (imprint, privacy policy, etc.) it works the same way: Pages → All Pages → open the desired page → ð¬ð§ → “+”.
Tip: Translate the legally relevant pages first (Imprint, Privacy Policy, Cookie Policy) before starting on the actual articles.
Legal note: A linguistic translation of these pages does not replace a legal review for other Target markets. Depending on the country, different requirements may apply – such as different mandatory disclosures in the imprint or additional data protection regulations. If in doubt, seek legal advice.
Part 8: Troubleshooting
Tanja places a cup of coffee on the table. “Now come the things I’ve already experienced. And Bernd too.” This chapter documents the most common problems encountered during Polylang setup and their solutions. The errors are organized by frequency and severity.
Common Errors
Error 1: EN link missing in the language switcher
Symptom: Only German appears in the menu; the EN link is invisible.
Cause: Polylang’s default behavior – EN is only shown when an English translation exists for the current page.
Solution: Use the HTML-2 widget in the Astra Header Builder (→ Steps 15–18).
Error 2: 404 error on /en/
Symptom: The English homepage your-domain.com/en/ shows a 404 error page.
Cause: Polylang hasn’t registered the rewrite rules yet.
Solution: In the backend go to Settings → Permalinks → “Save Changes”. No content needs to be changed – the click alone is enough to rewrite the rewrite rules.
Error 3: English page has no menu
Symptom: The navigation bar is completely missing on the /en/ homepage.
Cause: The English menu has not yet been assigned to the correct theme positions.
Solution: In the backend go to Appearance → Menus → “Manage locations” tab:
- Primary Menu English → Main Menu
- Off-Canvas Menu English → Main Menu
Layout Errors
Error 4: Language switcher not visible in header (Astra grid problem)
Symptom: The language switcher is built into the header builder but invisible in the frontend.
Cause: Astra calculates column widths dynamically. The center column can get a width of 0px – everything inside becomes invisible. This happens when Astra detects that the center column is empty and simply allocates no space for it.
Diagnosis: Check in the browser console (F12):
const header = document.querySelector('.ast-primary-header-bar .ast-builder-grid-row-has-sides');
getComputedStyle(header).gridTemplateColumns;
// If the result reads "639.5px 0px 639.5px" the problem is confirmed
Solution: Add this CSS override under Customizer → Additional CSS:
/* Language switcher: make the center column visible */
.ast-primary-header-bar .ast-builder-grid-row-has-sides.ast-grid-center-col-layout {
  grid-template-columns: 1fr auto 1fr !important;
}
.ast-primary-header-bar .site-header-primary-section-center {
  min-width: 80px !important;
  overflow: visible !important;
}
Error 5: Polylang hides language switcher via CSS
Symptom: The language switcher is present in the source code but not visible in the browser.
Cause: Polylang adds the CSS rule .lang-item { display: none } by default and normally re-shows the items via JavaScript. In some theme setups this JavaScript doesn’t run – and everything stays hidden.
Diagnosis: Check in the browser console:
// Sucht nach der problematischen Regel in allen Stylesheets
[...document.styleSheets].forEach(s => {
  try { [...s.cssRules].forEach(r => {
    if (r.selectorText && r.selectorText.includes('lang-item')) console.log(r.cssText);
  }); } catch(e) {}
});
Solution: The CSS in the Customizer (Step 8) sets .lang-item { display: none !important; } and instead uses its own HTML-2 widget, which is not affected by Polylang CSS.
Critical Errors
Error 6: PHP syntax error / website offline
This is Bernd’s specialty. Bernd: “I quickly wrote something in functions.php. Then the site was gone.”
Tanja: “How long?”
Bernd: “…one hour.”
Ulf: “One hour! That’s a complete halftime break.”
Symptom: After a change in functions.php, the website shows only a white screen or an HTTP 500 error. The WordPress backend is no longer accessible.
Cause: A PHP syntax error in functions.php brings WordPress down completely. WordPress doesn’t validate the code before saving – it just saves, even if the code is broken.
Solution A: Restore via hosting backup (recommended)
Most hosting providers have a backup function. With Strato, for example:
- Strato customer center → BackupControl
- Select the last backup before the change
- Navigate to
/wp-content/themes/your-theme/ - Mark
functions.phpwith the ≠ symbol (= difference from backup) - “Restore selection” → Confirm
After restoration, the website is immediately back online:

And functions.php is back in its clean initial state:
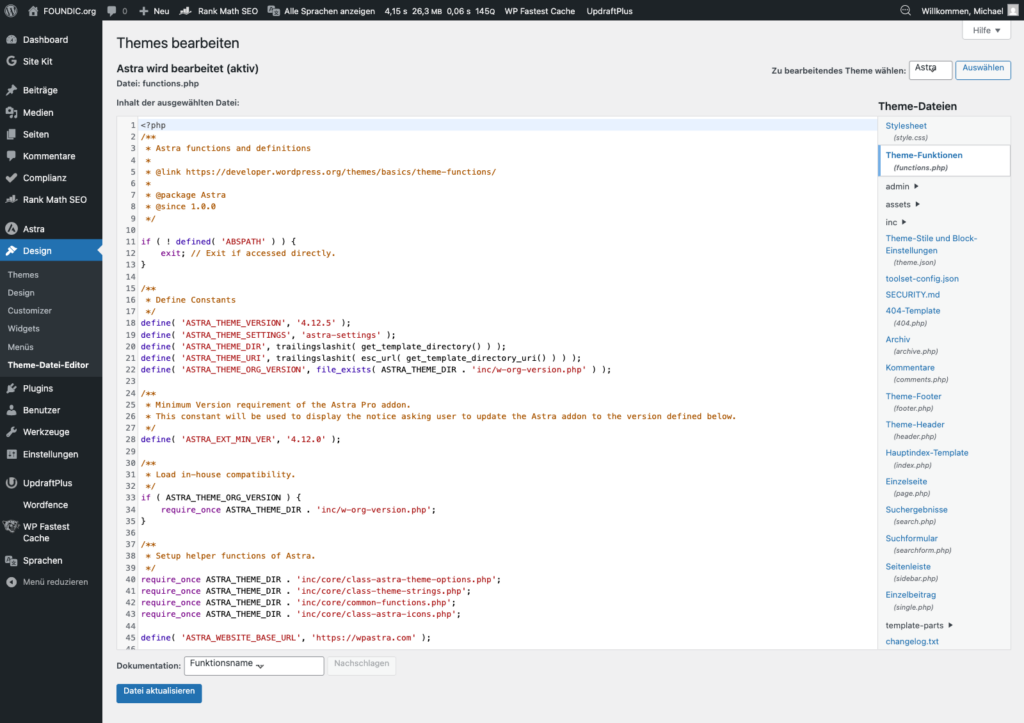
Solution B: Manually restore via FTP/SFTP
- Connect with an FTP program (e.g. FileZilla)
- Download the file
/wp-content/themes/your-theme/functions.php - Open in a text editor and remove the faulty code
- Upload and overwrite the file
Prevention: Never edit functions.php directly in the WordPress theme editor. Instead use the plugin “Code Snippets” (→ Step 24) – it validates code before activation and can deactivate individual snippets without destroying the entire website.
Error 7: Changes not visible in the frontend (cache problem)
Symptom: CSS changes or menu updates are not visible in the frontend, even though they were saved in the backend.
Cause: A caching plugin is still delivering the old cached version. The caching plugin doesn’t know you changed something – it simply serves the saved version.
Solution: After every change to CSS, menus, or theme settings, clear the cache: click “WP Fastest Cache” in the WordPress admin bar → select “Delete All Caches”.
Tip: When making changes directly in the Customizer, always click “Publish” first and only then clear the cache. The order matters.
Error 8: Browser language detection not working
Symptom: English-speaking visitors always land on the German page despite activated browser language detection.
Common causes and solutions:
| Cause | Solution |
|---|---|
| Homepage is cached | Exclude homepage from caching plugin (→ Step 26) |
| Admin is logged in | Admins are never redirected by Polylang – normal behavior |
| Cookie already set | Delete pll_language cookie and test again |
| Polylang setting disabled | Check Polylang → Settings → “Detect browser language” |
Test tip: A real test is only possible with a browser set to en, or via terminal:
curl -H "Accept-Language: en" https://your-domain.com/ -IYou should see a redirect to /en/.
Final Result: Functional Test DE ↔ EN
The following test shows the result with the native Polylang menu switcher (Variant A), which links directly to the respective translation on an article-by-article basis:
On the German article: DE | EN – clicking EN leads directly to the English version

After switching to EN: English menu, EN bold/orange, switching back to DE also works

Note for Variant B (HTML widget): The static HTML switcher in the header always points to the respective language homepage on subpages, not to the translated article. Article-specific switching with Variant B is only possible if the native Polylang switcher in the menu remains active as well.
Part 9: Maintenance and Later Changes
Tanja looks around the room. “You think that’s it?” It’s never really finished. Websites grow, themes change, new languages get added. Here are the most common maintenance scenarios – so you don’t have to start over.
Adding a third language: Add a new language in Polylang → Languages, create a new menu for this language, and extend the HTML widget in the header with a third link. Extend the CSS for .pll-link-xx accordingly.
Theme change: The HTML widget and the additional CSS are retained (they’re in the Customizer, not in the theme). After switching the theme, check whether the CSS selectors .ast-header-html-2 and .site-primary-header-wrap still apply – these are Astra-specific and must be adapted for other themes.
Switch from Astra Free to Astra Pro: Astra Pro offers a real header builder with free positioning. The HTML widget and the absolute CSS positioning can then be removed – instead, place the native Polylang switcher directly in the header builder.
Change of caching plugin: The exception for the homepage (→ Step 26) must be reconfigured in the new plugin. Otherwise browser language detection won’t work.
Migration to staging and back: The domain URLs in the HTML widget must be adjusted for the staging environment. Easiest: temporarily disable the widget on staging and only use the native Polylang switcher.
Part 10: Rollback / Deactivation
Sometimes you want to take a step back. No problem – here’s the clean way back.
Remove HTML widget: Appearance → Customize → Header Builder → drag or delete the HTML-2 widget from the header.
Reactivate native Polylang switcher: Appearance → Menus → Main Menu → expand the language switcher entry → set desired options. Remove the .lang-item { display: none !important; } block from the CSS.
Clean up CSS: In Customizer → Additional CSS, delete the entire block between /* ===== Language switcher DE | EN ===== */ and the last }. The remaining CSS of the website remains untouched.
Reset menus: Appearance → Menus → “Manage locations” tab → set “Primary Menu English” and “Off-Canvas Menu English” to “no menu” if desired.
Deactivate Polylang: Plugins → Polylang → Deactivate. Existing translation links remain in the database but are inactive without Polylang. All posts remain accessible – they simply lose their language assignment.
Part 11: Developer Note – Variant C
The HTML widget approach in Variant B is a pragmatic workaround for Astra Free. For production websites with long-term maintenance, a dynamic solution is more robust.
Tanja: “For developers there’s a more elegant solution.”
Bernd: “I’m basically also a developer.”
Tanja: “Bernd, you edited functions.php with Notepad.”
Bernd: “That’s a valid editor.”
Tanja: “I’ll continue.”
A technically more robust alternative is a dynamic language switcher that is integrated via a suitable theme hook, a template part, or a shortcode.
Example: Shortcode
// In einem Child-Theme oder per Code-Snippets-Plugin:
add_shortcode( 'sprachumschalter', function() {
    if ( ! function_exists( 'pll_the_languages' ) ) return '';
    ob_start();
    pll_the_languages( array(
        'show_flags'          => 0,
        'show_names'          => 0,
        'display_names_as'    => 'slug',
        'hide_current'        => 0,
        'hide_if_no_translation' => 0,
    ) );
    return ob_get_clean();
} );
The shortcode [sprachumschalter] can then be placed in a widget, a template part, or directly in the header markup. Polylang dynamically renders the correct URLs – on article pages the switcher links directly to the linked translation, not to the homepage.
Output format: pll_the_languages() renders an HTML list by default:
<ul class="ast-nav-menu">
  <li class="lang-item lang-item-de current-lang"><a href="/">DE</a></li>
  <li class="lang-item lang-item-en"><a href="/en/">EN</a></li>
</ul>
The resulting markup must be adapted via CSS to the header layout depending on the theme – especially display, spacing, and highlighting of the active language.
Advantages over Variant B:
- No static URLs – works without adjustment on domain change and staging
- Article-specific switching automatic
- New languages are automatically included
Recommended for production use: Implement in a child theme so theme updates don’t overwrite the code. Add CSS for active language, contrast, and focus style (→ Accessibility, see below). After every theme update check whether hook positions still work.
Note: pll_the_languages() outputs an HTML list and should be included in a visible frontend area – not in the <head> of the page.
Go-Live Checklist
Before officially launching the bilingual website, check off these points. ✅ Required · ⚪ Optional · ð ± Variant B only · ð Only with active redirect
Basic function:
- ✅ German homepage loads correctly (
your-domain.com/) - ✅ English homepage loads correctly (
your-domain.com/en/) – no 404 - ✅ Permalinks have been saved again
- ✅ Cache cleared after all changes
Navigation:
- ✅ German menu shows correct categories
- ✅ English menu shows correct categories
- ✅ Language switcher visible
- ✅ Active language displayed in bold and colored
Language switching:
- ✅ Variant A / C: Click EN from DE article → lands directly on English translation
- ✅ Variant A / C: Click DE from EN article → lands directly on German original
- ð
± Variant B: Header switcher correctly points to
/(DE) and/en/(EN) - ð ± Variant B: Behavior on subpages consciously tested and documented
Content:
- ✅ At least one DE/EN post translated and linked as a test
- ✅ Legal pages available in both languages
Browser redirect:
- ð Browser redirect tested in incognito tab (no admin cookie)
- ð Google Search Console: no new crawling errors after activation
Technical:
- ⚪ Tested on desktop, tablet, and mobile
- ⚪ Accessibility: language switcher reachable via keyboard, sufficient contrast
- ⚪ XML sitemap: EN URLs appear in the sitemap (regenerate SEO plugin if needed)
Summary: What Was Set Up?
Common foundation (all variants):
| What | Result |
|---|---|
| Plugin | Polylang (free) |
| Languages | German (de_DE) + English (en_US) |
| URL structure | DE: your-domain.com/ · EN: your-domain.com/en/ |
| Existing content | All marked as “German” |
| English menu | Separate navigation with translated category names |
Variant A – Standard:
| What | Result |
|---|---|
| Language switcher | Native Polylang switcher in the menu, dynamic, article-specific |
| Maintenance effort | Low |
Variant B – Astra Free centered (this guide):
| What | Result |
|---|---|
| Language switcher | Static HTML widget, centered in the header |
| Styling | Active language bold + accent color via html[lang] selector |
| Article-specific switching | Only with an additional native Polylang switcher |
| Maintenance effort | Medium – URLs must be updated manually on domain change |
Optional (independent of variant):
| What | Result |
|---|---|
| Browser language detection | Automatic redirection for new visitors |
| EN fallback | All non-DE languages → English (product decision) |
| Cache exception | Homepage excluded from cache (only needed with active redirect) |
| PHP snippets | Via “Code Snippets” plugin, not directly in functions.php |
Accessibility Notes
With the custom HTML widget (Variant B), accessibility is not guaranteed automatically. This sounds like bureaucracy – but it’s a real difference for keyboard users and screen reader users. These points should be checked and added:
aria-label on the nav element:
<nav class="pll-switcher-center" aria-label="Switch language">
  <a href="..." class="pll-link-de" hreflang="de" lang="de">DE</a>
  <span class="pll-sep" aria-hidden="true">|</span>
  <a href="..." class="pll-link-en" hreflang="en" lang="en">EN</a>
</nav>
Don’t mark the active language only by color – add aria-current="true" on the active link or make sure the bold styling alone is sufficient as a visual distinction. Color alone is not an adequate distinguishing criterion according to WCAG.
Check contrast: The inactive color (#888 in the example CSS) may have insufficient contrast against a white header. Target: at least 4.5:1 for normal text (WCAG AA).
Focus style: Make sure the links are reachable via keyboard and have a visible focus frame. Many themes remove the browser’s default focus via outline: none. Add in the Customizer CSS:
.pll-switcher-center a:focus-visible {
    outline: 2px solid currentColor;
    outline-offset: 2px;
}
This ensures a visible focus frame for keyboard navigation without affecting the visual design when using a mouse.
SEO Check After the First Translations
Once the first posts have been published in both languages, check these points:
- hreflang tags: Are the hreflang tags correctly paired? DE page references EN, EN page references DE. Check in the page source:
<link rel="alternate" hreflang="de" href="..."/>and<link rel="alternate" hreflang="en" href="..."/>must both be present. - Canonicals: Does each page point to itself as the canonical? DE page → DE URL, EN page → EN URL. No cross-linking.
- Indexing: Are EN pages indexable? Check in Google Search Console whether
/en/URLs are crawled and indexed. Don’t index empty EN drafts (without content) – either set to noindex or only publish when content is available. - Internal links: Are internal links within a language area consistent? German articles link to German pages, English to English.
- XML sitemap: Do EN URLs appear in the sitemap? After publishing the first English posts, open the SEO plugin (Rank Math, Yoast, etc.) and regenerate the sitemap once. Submit the sitemap in Google Search Console and check whether EN pages are indexed without errors.
Next Steps
The technical setup is complete. Tanja nods with satisfaction. Ulf looks out the window. Bernd is just opening a new browser window – you never know.
Now you can gradually add content in English:
- Legally relevant pages first: Imprint → Legal Notice, Privacy Policy → Privacy Policy
- Then translate the most important articles
- Each translated page automatically appears in the language switcher of the corresponding DE article
Ulf: “That wasn’t so bad after all.”
Tanja: “Everyone says that at the end.”
Bernd: “I would have done that in ten minutes.”
Tanja: “Bernd, you’re still not done with your backup from last month.”
Bernd: “That’s an ongoing project.”
How the site you are adding two languages to comes about in the first place is covered in Creating Your Own Website for Beginners with WordPress: A Practical Step-by-Step Guide Using foundic.org as an Example.
With both language versions in place, „Buy Us a Coffee“ – How to Set Up a Ko-fi Donation Button in WordPress: A Step-by-Step Guide is worth a look — a small building block that makes the site friendlier.
FOUNDIC.org is ad-free and has no paywall. If this guide helped you:  Treat us to a coffee