
A field report featuring Ko-fi, PayPal, PHP and a touch of trademark law
Do you want to add a donation button to WordPress without a subscription model, without advertising, without technical effort? This guide shows you step by step how to add Ko-fi to WordPress: from creating the account to the payment method to the finished button on your website. We also explain why Ko-fi is the better choice over Buy me a Coffee, what trademark law has to do with it, and how the button works in several languages automatically.
To make this guide easier to follow, three people accompany you: the typical office characters. The competent IT colleague, the self-appointed expert and the honest beginner. These three perspectives help you spot the usual pitfalls. Tanja is the IT expert. She knows how things work, explains patiently and in a structured way – and does not let bad advice throw her off. If you have a question, Tanja has the answer. Bernd is the self-appointed “expert” who knows everything better and is usually wrong. His shortcuts and his half-knowledge lead to problems on a regular basis. He stands for all the dangerous myths and bad practices you should avoid. Ulf is the learner, just like you. He asks the questions buzzing around in your head, and sometimes needs an everyday comparison to understand IT. If Ulf does not understand something, that is perfectly fine – that is what Tanja is there for.
And… action!
Why a coffee button in the first place?
Bernd waves a crumpled note: “I already solved that. I just copied my PayPal link into the footer. Done. Costs nothing, has worked since 2011.”
Tanja looks at him: “Since 2011. Mobile-optimised?”
Silence.
Tanja: “And if someone donates 3 euros – how much of that do you keep?”
Bernd looks at his note: “…PayPal handles that, surely.”
Tanja: “PayPal charges fees. Buy me a Coffee takes another five per cent on top. And your link from 2011 looks like a phishing page.”
Ulf raises his hand: “What is a donation button, actually?”
Tanja: “Good question, Ulf. Imagine you run a blog, a YouTube channel, a website – in short: you produce content that people find useful. You do not want to run ads. A subscription model is too much effort for you. But every now and then someone is happy to donate a small amount if they feel your work was worth it.
That is exactly what donation platforms are for. They provide you with a ready-made payment page, you link to it from your website – and visitors can send a one-off payment with a few clicks. No subscription, no mandatory registration for the donor, no technical development of your own.
The best-known of these concepts is called “Buy me a Coffee” – a platform that allows creators (content creators, meaning people who publish content regularly) to receive symbolic one-off donations. The idea is as plain as it is charming: those who want to, give. Those who do not, simply keep reading.”
For foundic.org – a platform built around AI news, training and hands-on projects – that was exactly the starting point. Stay independent, work without advertising and still be funded in the long run. The road there did not lead straight to Buy me a Coffee, however, but first through a sober platform analysis. And that analysis had a surprising recommendation in store.
Ko-fi vs. Buy me a Coffee: why Ko-fi is the better choice
Bernd says: “Buy me a Coffee sounds good. I know that one. Done.”
Tanja opens a table: “Here. Five per cent platform fee on every donation. And Stripe as the only payment route.”
Bernd: “Stripe is fine, though.”
Tanja: “For credit cards, yes. But most of your readers pay with PayPal.”
Ulf blinks: “Is that like… when the club only accepts cash, but everyone wants to set up their membership by direct debit?”
Tanja nods: “Exactly like that.”
Before you create an account anywhere, a quick look at the alternatives pays off. Platform fees and payment routes are not a side issue – they decide how much of a donation actually reaches you.
| Platform | Fee on one-off donations | Payment routes |
|---|---|---|
| Buy me a Coffee | 5 % | Stripe only |
| Ko-fi | 0 % | Stripe + PayPal |
| Patreon | 5–12 % | Stripe |
| Gumroad | 10 % | Stripe |
Ko-fi takes zero per cent on one-off donations. That sounds like a detail – but projected over months and many donors the difference is considerable. On top of that, Ko-fi supports PayPal as a payment route, which is a decisive advantage in German-speaking countries. And donors do not need a Ko-fi account of their own in order to donate.
The decision for foundic.org clearly fell on Ko-fi.
Fact check: Ko-fi at a glance
- No platform fee on one-off donations (only the normal Stripe or PayPal fees apply)
- Supports PayPal and Stripe in parallel
- Donors do not need a Ko-fi account
- Free account with no hidden monthly charges
- WordPress integration possible via embed code
Quick answer: what does Ko-fi cost?
Ko-fi charges 0 % platform fees on one-off donations. Only the normal transaction fees of the chosen payment provider apply: with PayPal roughly 1.90 % + €0.35 per transaction (depending on the account model), with Stripe roughly 1.5 % + €0.25 for European cards. Buy me a Coffee takes an additional 5 % on every donation. With Ko-fi that share stays entirely with you.
Something to chew on: Take a quick look at the payment habits of your audience. Mostly German-speaking? Then PayPal support is not a bonus but a requirement. Mostly international? Then Stripe is often enough. That question decides which platform is right for you.
A small trademark problem – and its elegant solution
Bernd says: “I would just call the button ‘Buy me a coffee’. Sounds likeable. Everybody knows that wording.”
Tanja puts her coffee cup down. Very slowly: “That is a registered trademark.”
Bernd: “Seriously.”
Tanja: “USPTO, registration no. 6503375, since September 2021. Scope of protection: software and websites that allow creators to receive donations.”
Bernd: “…But those are just four words.”
Tanja: “Four words that belong to a company.”
Ulf: “Is there not simply something that sounds the same but is not theirs? Like saying ‘Tempo’ when you actually mean a no-name tissue?”
Tanja: “That is exactly what we are going to do.”
Buy Me a Coffee is a trademark registered with the US Patent and Trademark Office (USPTO). The owner is Publisherr Inc. The scope of protection expressly covers software and websites that allow creators to receive donations. Using the exact trademark on a competing product is legally risky – even if it is only four words and a caffeine promise.
The solution is simple: choose your own wording that carries the spirit of the original without touching its trademark. Two variants were settled on for foundic.org:
- German: “Lade uns auf einen Kaffee ein”
- English: “Treat us to a coffee”
The “us” is no accident. It emphasises the team behind foundic.org and makes the invitation more personal. In trademark terms it is clean. And it works well in both languages.
Fact check: trademark vs. generic term
- “Buy Me a Coffee” = registered trademark (USPTO), do not use on Ko-fi buttons or other platforms
- Alternative wordings such as “Treat us to a coffee”, “Spendiere uns einen Kaffee” or “Support us” are unproblematic
- Rule of thumb: if an expression is both a brand name and a product description, better rephrase it
Something to chew on: Think of your own button text now. Not the generic one (“Support me on Ko-fi”), but something that fits you and your audience. Write it down – you will need it in a moment.
Step 1: create a Ko-fi account
Bernd already has a tab open: “I have registered already. Username: ‘DerBernd1967’.”
Tanja: “And your Ko-fi link would then be…?”
Bernd: “ko-fi.com/DerBernd1967.”
Tanja: “And that goes on your professional website.”
Bernd: “…I can still change it.”
Tanja: “Yes. Do that.”
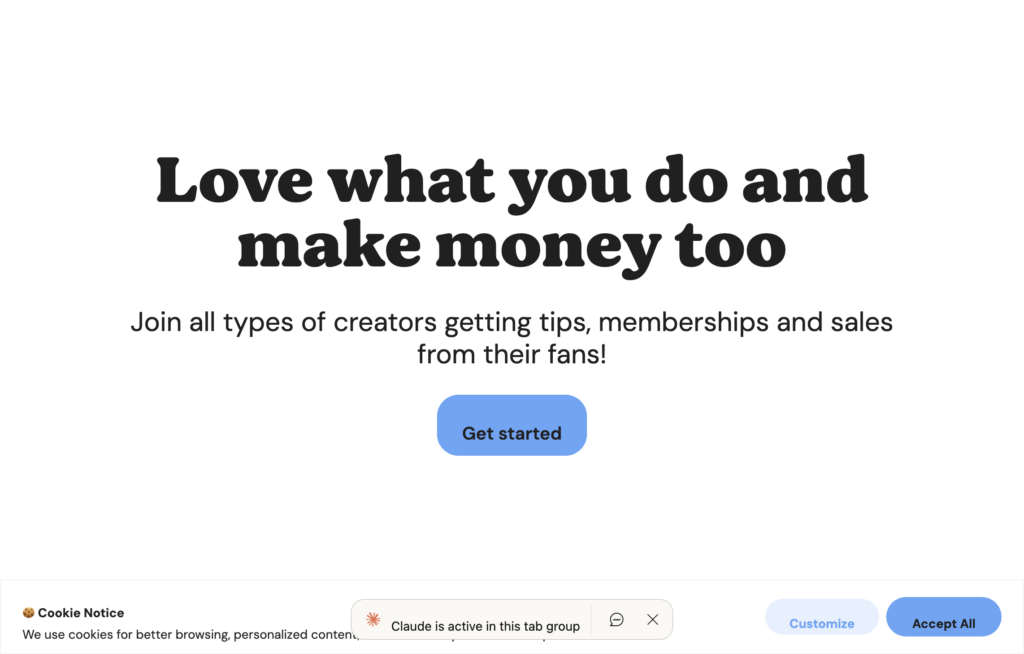
Off we go to ko-fi.com. The home page greets you with the promise “Love what you do and make money too” and a large “Get started” button.
Registering
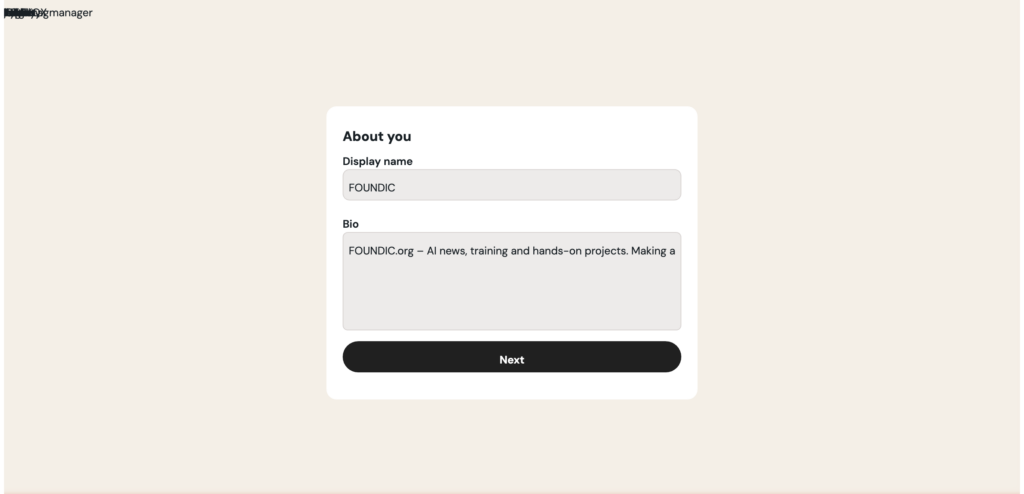
The form is pleasantly slim: Display name (the name visitors to your Ko-fi page will see), email address and password. Alternatively you can register via Twitter, Google or Apple – that saves entering the data by hand.
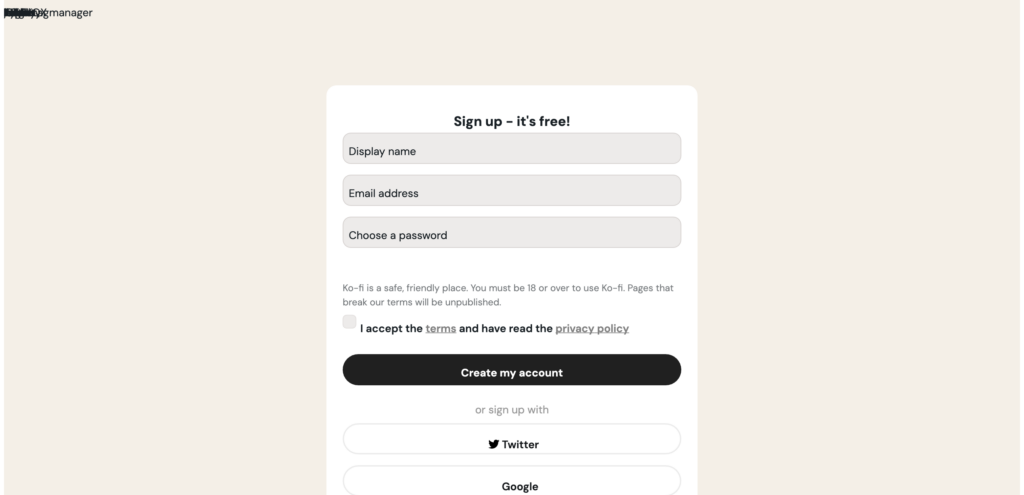
For the display name the rule is: enter the name your website is known by right away – for example “FOUNDIC” instead of your first name. You can change it later, but it is easier to start correctly.
Choosing the right username
Right after registration Ko-fi asks for a username – because it becomes the basis of your personal Ko-fi URL. Ko-fi suggests something (usually your first name plus a random number), which you should replace with your own brand name immediately.
Ulf would ask: “Is that like a squad number in football? You keep it for the whole season?”
Almost. The username becomes part of your permanent web address. ko-fi.com/foundic is clean, memorable and professional. ko-fi.com/michael78459 is not.
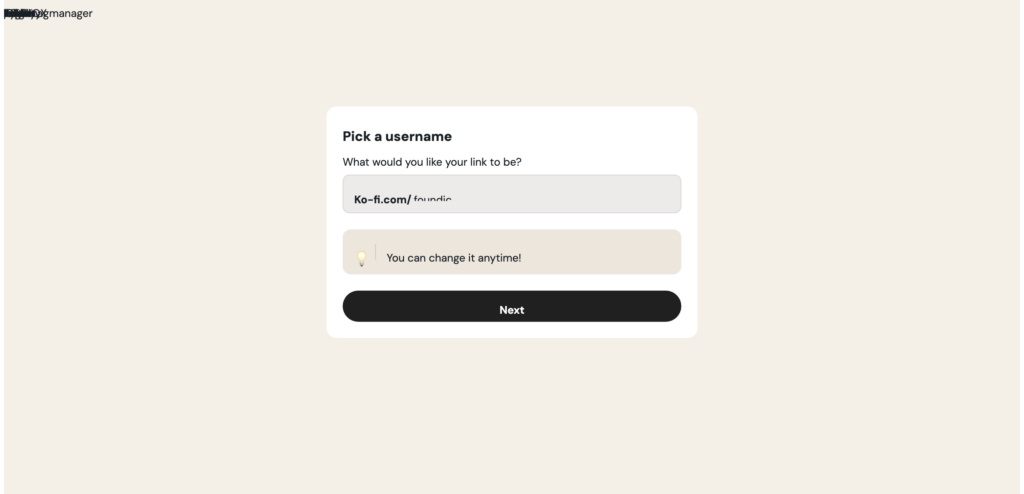
Ko-fi points out kindly: “You can change it anytime!” – technically that is true, but it is still better to pick the right name straight away. As soon as your Ko-fi URL is linked from your website, changing it becomes more work.
Categories: visibility on the Explore page
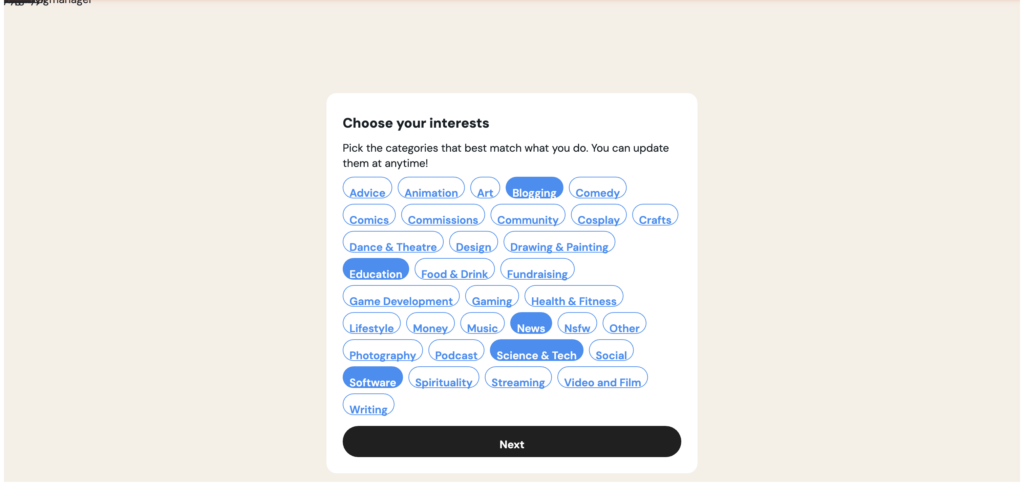
After the username step Ko-fi asks for your interest categories. These are used on Ko-fi’s internal Explore page, where supporters can discover new creators.
An honest assessment here: most donors will not come to you via Ko-fi’s Explore page, but via the direct link on your own website. The categories are not a traffic miracle, but they do no harm either. Simply pick whatever describes your content most accurately.
Five categories were chosen for foundic.org: Blogging, Education, News, Science & Tech and Software.
The profile: name and bio
The next step is the bio – a short self-description that appears on your Ko-fi profile page. English is a good idea here, because Ko-fi is an international platform and your profile page may be opened by people worldwide.
For foundic.org: display name set to “FOUNDIC” (later to “FOUNDIC.org”), bio in English:
“FOUNDIC.org – AI news, training and hands-on projects. Making artificial intelligence accessible and practical.”
Fact check: registration at a glance
- Go to ko-fi.com → “Get started”
- Enter display name, email, password (or use social login)
- Choose a username → becomes the permanent Ko-fi URL (
ko-fi.com/yourname)- Choose interest categories (optional, but recommended)
- Fill in display name and bio – tip: display name = brand name, bio ideally in English
Something to chew on: Before you register – write down the username you want. Check quickly whether
ko-fi.com/yournameis still free by simply calling the URL in your browser. If no page exists, the name is still available.
Step 2: confirm your email
Ko-fi requires an email verification before your page goes live. That is not bureaucratic annoyance but a security standard: without confirmation, anyone could create an account with someone else’s email address.
A four-digit code is sent to the address you entered. Type the code into the form – alternatively you can click the link in the email.
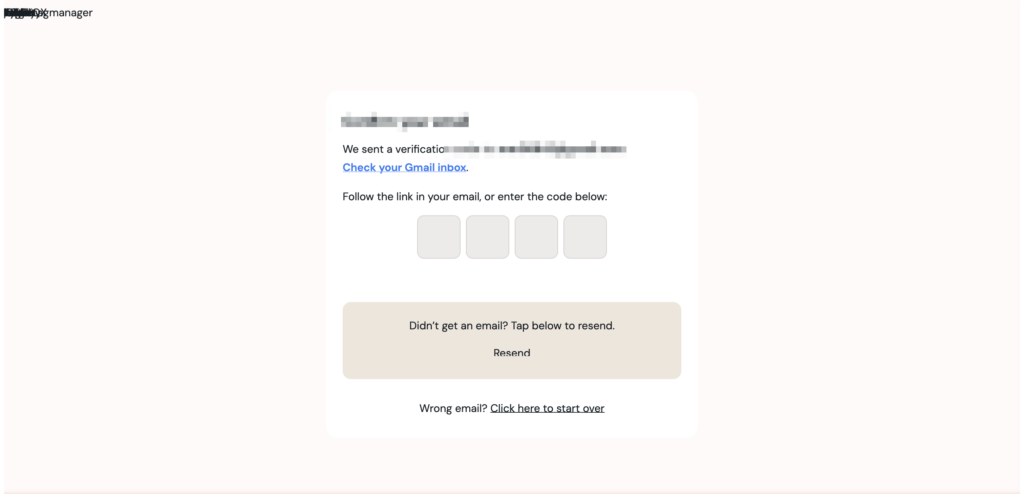
No email? Take a look in your spam folder. Ko-fi messages end up there occasionally because they are sent by automated systems and spam filters sometimes overreact.
Step 3: the page is live
“Your page is live! foundic” – Ko-fi is not exactly frugal with success messages, and that is entirely justified. Your profile page at ko-fi.com/foundic really does exist from this moment on.
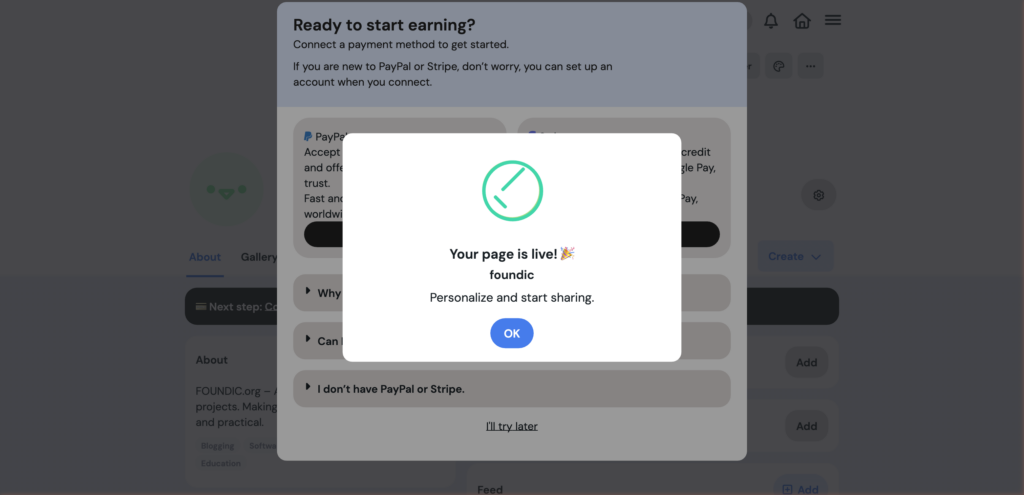
At the same time Ko-fi opens the payment method dialog directly. No detour through settings, no hidden submenu. That is a good thing – without a payment method nobody can donate.
Step 4: connect a payment method
Bernd: “I will just use my company credit card.”
Tanja: “Bernd. Ko-fi pays donations out to your receiving account. You have to connect your PayPal or Stripe to it – not your credit card.”
Bernd: “I do not have PayPal.”
Ulf: “That is just like the club: if you do not have an account with the right bank, you do not get a transfer.”
Tanja: “Exactly.”
Ko-fi offers two payment routes: PayPal and Stripe.
PayPal is the most widely used online payment service in German-speaking countries. It accepts payments from all over the world, pays out quickly and needs no technical setup.
Stripe is a payment service that supports credit and debit cards (Visa, Mastercard), Google Pay and Apple Pay. Somewhat more technical to set up, but indispensable for visitors without a PayPal account.
Both can be active in parallel – which is in fact recommended, because it gives you maximum reach.
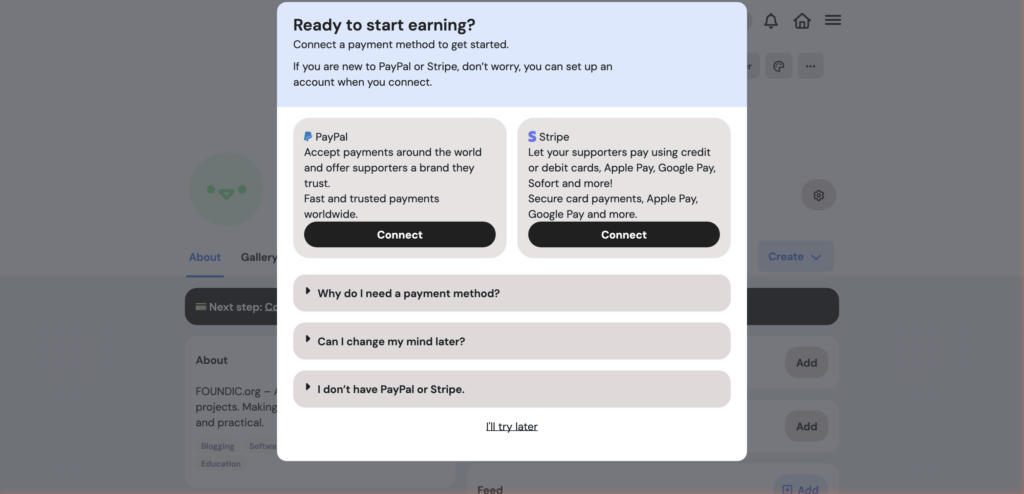
The connection does not run through Ko-fi but directly through the login of the respective payment provider. For PayPal: you click “Connect”, Ko-fi forwards you to the PayPal sign-in page, you log in there and confirm the connection. This is deliberately designed that way for security reasons – Ko-fi never sees your PayPal credentials at any point.
The result is unambiguous:
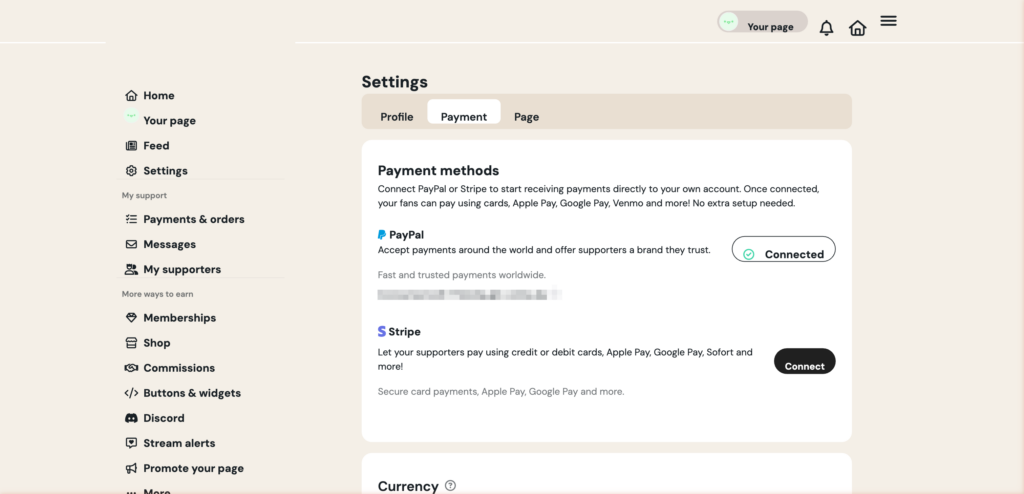
A green “Connected” status. Ko-fi is now ready for use. Donations can be received.
Fact check: payment methods
- PayPal: First choice for German-speaking countries. Quick setup, broad acceptance
- Stripe: For international payers and credit card users. A little more effort to set up
- Activating both in parallel = maximum reach
- Ko-fi does not see your credentials – the connection runs directly through the payment provider
Something to chew on: Sign up with Ko-fi now and connect your payment method. If you do not have a PayPal account yet: paypal.com → create a free personal account → then connect Ko-fi. Setting up Stripe is optional and can be added at any time.
Step 5: create the button
Bernd says: “I would just take a screenshot of the button. Then embed it as an image in the page. Sounds much simpler.”
Tanja: “A screenshot of a button that links to an image which in turn…”
Bernd: “Points to my Ko-fi page.”
Tanja: “…An image cannot be clickable without further code. On top of that you lose the animation and the dynamic text.”
Ulf: “Like pinning up a photo of the fixture list instead of the real fixture list.”
Tanja: “Slightly more complicated, but yes.”
Under Settings → Buttons & Widgets you will find Ko-fi’s widget builder. Several forms of integration are available:
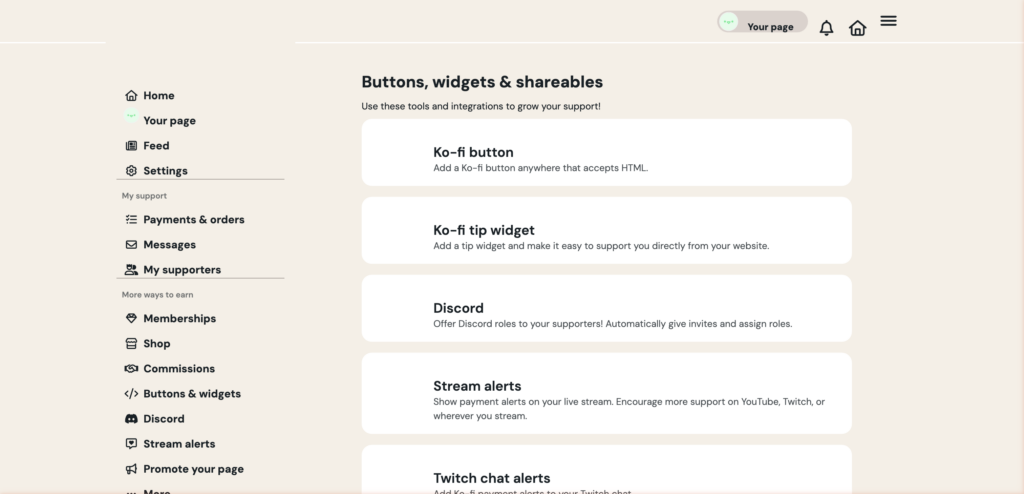
For WordPress the Ko-fi button is the best fit. It generates an embed code – a small piece of JavaScript (JavaScript is a programming language that runs in the visitor’s browser and controls the display of dynamic elements on a website) that you paste straight into WordPress.
Everything can be adjusted as you like in the widget builder: the button text (freely chosen, not limited to Ko-fi’s standard wording), the background colour of the button, and a preview that shows immediately what the result looks like.
This is where the generic “Support me on Ko-fi” becomes your own wording – and the colour is set to the FOUNDIC blue (#2563eb):
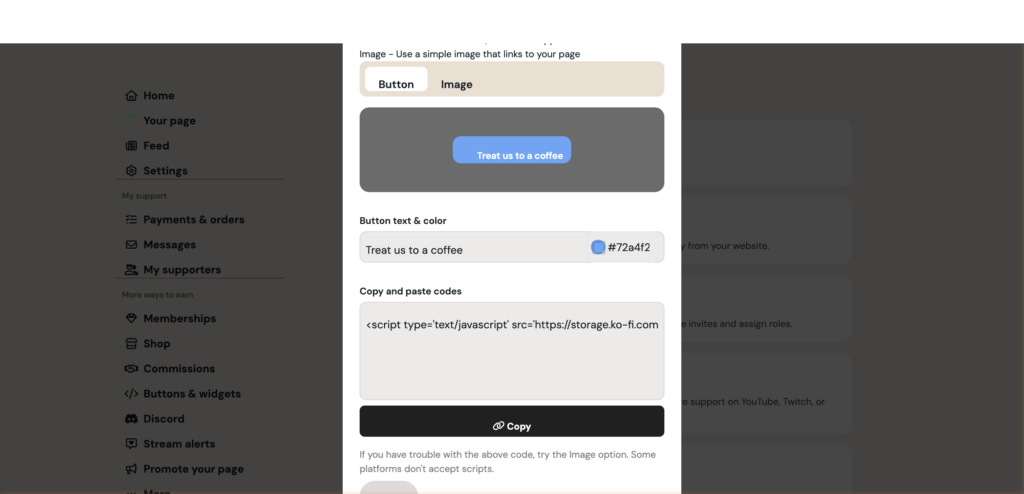
Ko-fi shows the finished embed code right away. For foundic.org it looks like this:
<script type='text/javascript' src='https://storage.ko-fi.com/cdn/widget/Widget_2.js'></script>
<script type='text/javascript'>
  kofiwidget2.init('Treat us to a coffee', '#2563eb', 'DEINE_KOFI_ID');
  kofiwidget2.draw();
</script>
No need to panic about the code – you do not have to understand it, only copy it. But for everyone who likes to know: kofiwidget2.init() is the command that initialises (prepares) the button. The round brackets hold three values: the button text, the colour (as a hex code, meaning a six-character colour identifier) and the Ko-fi ID of your account.
For the German-language version you only swap the text:
kofiwidget2.init('Lade uns auf einen Kaffee ein', '#2563eb', 'DEINE_KOFI_ID');
Fact check: button configuration
- Button text: freely chosen → your own wording (without trademark problems)
- Colour: entered as a hex code (e.g.
#2563ebfor FOUNDIC blue) → the button matches your website’s brand colour- Ko-fi ID: your personal identifier, included in the code automatically
- Embed code: copy it directly and paste it into WordPress
Something to chew on: Open the Ko-fi widget builder. Enter the text you want (the one you thought of earlier). Adjust the colour to your website – you will often find your website’s primary colour in the theme settings or in the browser inspector. Copy the generated code. You will need it in the next step.
Step 6: add the button to WordPress
Bernd is already navigating through the WordPress back end: “I will just go into the file editor and paste that into footer.php.”
Tanja jumps up: “Stop.”
Bernd: “What? I know what I am doing.”
Tanja: “If you make a typo in footer.php, the entire website is down. No CSS, no navigation, just an empty white screen. And with the next theme update your changes will be overwritten.”
Bernd: “…I will make a backup first.”
Tanja: “No. We are using Code Snippets.”
Ulf: “What is Code Snippets?”
The tool: Code Snippets plugin
The Code Snippets plugin is an extension for WordPress (a plugin is an add-on app for WordPress that adds new features without touching the core of the system). It lets you insert your own code without editing theme files directly. That has three decisive advantages:
- Safety: An error in the snippet affects only that snippet, not the entire website
- Persistence: The code survives even if you switch themes later
- Clarity: You see at a glance which code is active and which is not
A comparison for Ulf: Code Snippets is like the coach’s folder on the touchline. The tactics are in there, but it does not overwrite the official rule book. When the coach leaves, he takes the folder with him – the rule book stays.
The goal: a language-aware button on all category pages
For foundic.org the goal was specific: the Ko-fi button should appear automatically on all archive pages (category pages such as “AI-News”, “Topics”, “Projects”) – right-aligned next to the page heading, depending on the language:
- On German-language pages: “Lade uns auf einen Kaffee ein”
- On English-language pages: “Treat us to a coffee”
Foundic.org uses the Polylang plugin for multilingual support. Polylang provides a function calledpll_current_language()that reports the active language – “de” for German, “en” for English. The button text is chosen automatically based on that answer.
The PHP code – and what it does
PHP is a programming language that WordPress itself is written in. It runs on the server (the computer WordPress is installed on), not in the visitor’s browser. PHP is responsible for WordPress assembling pages before they are sent to the browser.
The snippet consists of three parts. It is deliberately kept plain: no constants, no separate loading function, but exactly the three moves that are needed – output the button, set the layout, push the button into the right place.
Part 1: the button
add_action('astra_archive_header', 'foundic_kofi_archive_button', 15);

function foundic_kofi_archive_button() {
    if (!is_archive()) return;

    $lang = function_exists('pll_current_language') ? pll_current_language() : 'de';

    if ($lang === 'en') {
        $button_text = 'Treat us to a coffee';
    } else {
        $button_text = 'Lade uns auf einen Kaffee ein';
    }

    echo '<div id="kofi-archive-btn">';
    echo '<script type="text/javascript" src="https://storage.ko-fi.com/cdn/widget/Widget_2.js"></script>';
    echo '<script type="text/javascript">kofiwidget2.init(\'' . esc_js($button_text) . '\', \'#2563eb\', \'G2G11X96H2\');kofiwidget2.draw();</script>';
    echo '</div>';
}
Why the script tag and init() sit directly next to each other. This is the decisive point of this snippet, and it is easy to overlook. The line with <script src="…Widget_2.js"> loads the Ko-fi library, the line below it immediately calls a function from it with kofiwidget2.init(). Both sit in the same <div>, one directly after the other – which is why the library has finished loading by the time the call arrives.
The obvious “clean” way would be to load the library via wp_enqueue_script(). In WordPress that is the usual route for external scripts, but here it walks into a trap: wp_enqueue_script() puts the script at the end of the page by default, while the button is output in the header area. The call would then arrive before the loading, and the browser console would read ReferenceError: kofiwidget2 is not defined – the button would not appear at all. Anyone who wants to rebuild it has to force the script into the <head>. Leaving the two together is simpler.
The values in the code. The Ko-fi ID and the colour sit directly in the function. If anything changes, exactly that one line is adjusted. esc_js() makes sure the button text lands in JavaScript safely, even if it contains a quotation mark.
add_action attaches the function to a particular point in the page build – here to astra_archive_header, a so-called hook in the Astra theme that is called on category pages. is_archive() checks whether we are on an archive or category page at all – if not, nothing happens. The number 15 at the end of add_action is the priority: it decides at which position within this hook the function is called.
Part 2: the CSS for positioning
CSS (Cascading Style Sheets) is the language that controls the appearance and arrangement of elements on a website. Here the ast-archive-description element (the container that wraps heading and button) is switched to flexbox – a modern CSS layout model that arranges elements side by side.
add_action('wp_head', 'foundic_kofi_archive_css');

function foundic_kofi_archive_css() {
    if (!is_archive()) return;
    echo '<style>
    .ast-archive-description {
        display: flex !important;
        align-items: center;
        justify-content: space-between;
        flex-wrap: wrap;
    }
    #kofi-archive-btn { flex-shrink: 0; }
    #kofi-archive-btn .kofi-button { margin: 0 !important; }
    @media (max-width: 768px) {
        .ast-archive-description { flex-direction: column; align-items: flex-start; }
        #kofi-archive-btn { margin-top: 10px; }
    }
    </style>';
}
The @media block at the end is the responsive adjustment: on screens narrower than 768 pixels (typically smartphones) the layout switches from side by side to one below the other. The button then slides beneath the heading – which looks considerably better on small screens.
Part 3: the JavaScript correction
add_action('wp_footer', 'foundic_kofi_move_button');

function foundic_kofi_move_button() {
    if (!is_archive()) return;
    echo '<script>
    document.addEventListener("DOMContentLoaded", function() {
        var btn = document.getElementById("kofi-archive-btn");
        var section = document.querySelector(".ast-archive-description");
        if (btn && section) { section.appendChild(btn); }
    });
    </script>';
}
This part sounds more technical than it is. The Astra theme renders the button (because of the hook order) outside the heading container. This piece of JavaScript waits until the page has fully loaded (DOMContentLoaded) and then moves the button container into the right place inside the heading area. A comparison for Ulf: as if the ball boy only ran to his position after kick-off – it still works, because the match is only just beginning.
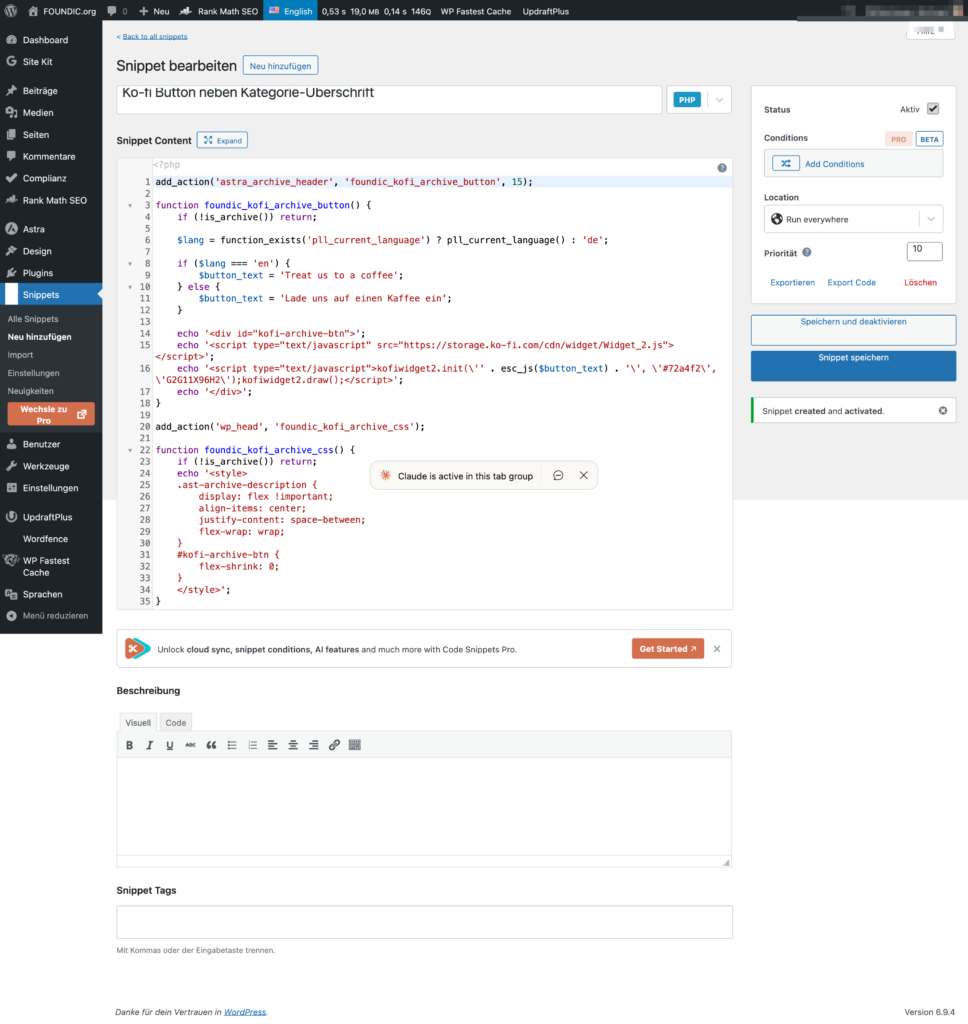
The result
This is what the AI News page on foundic.org looked like before the button was added:
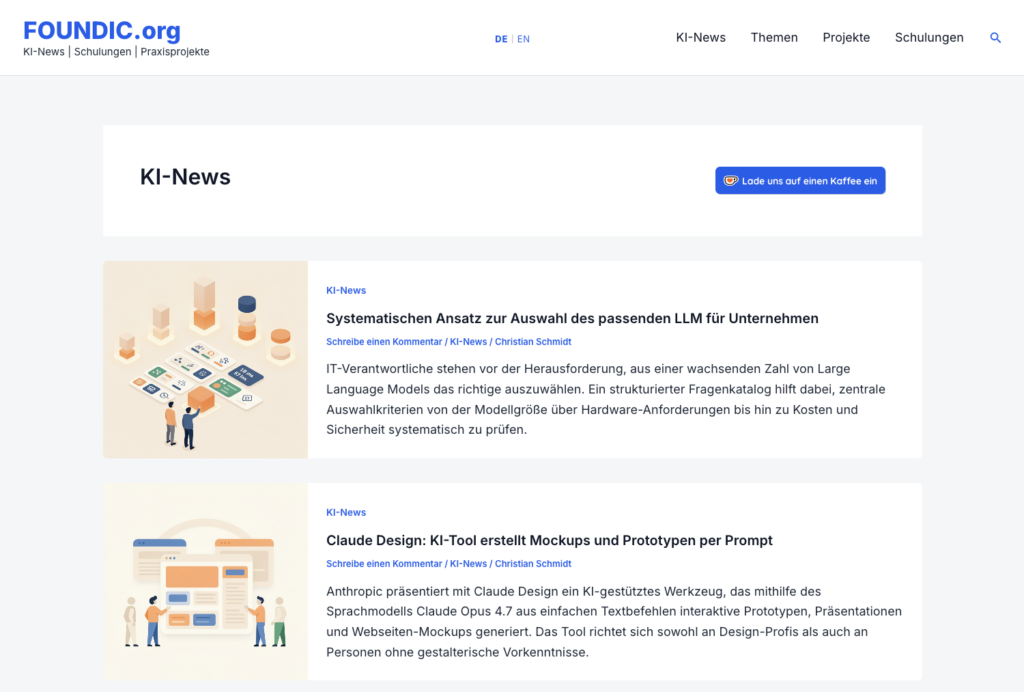
And on other category pages – automatically, without any further configuration:
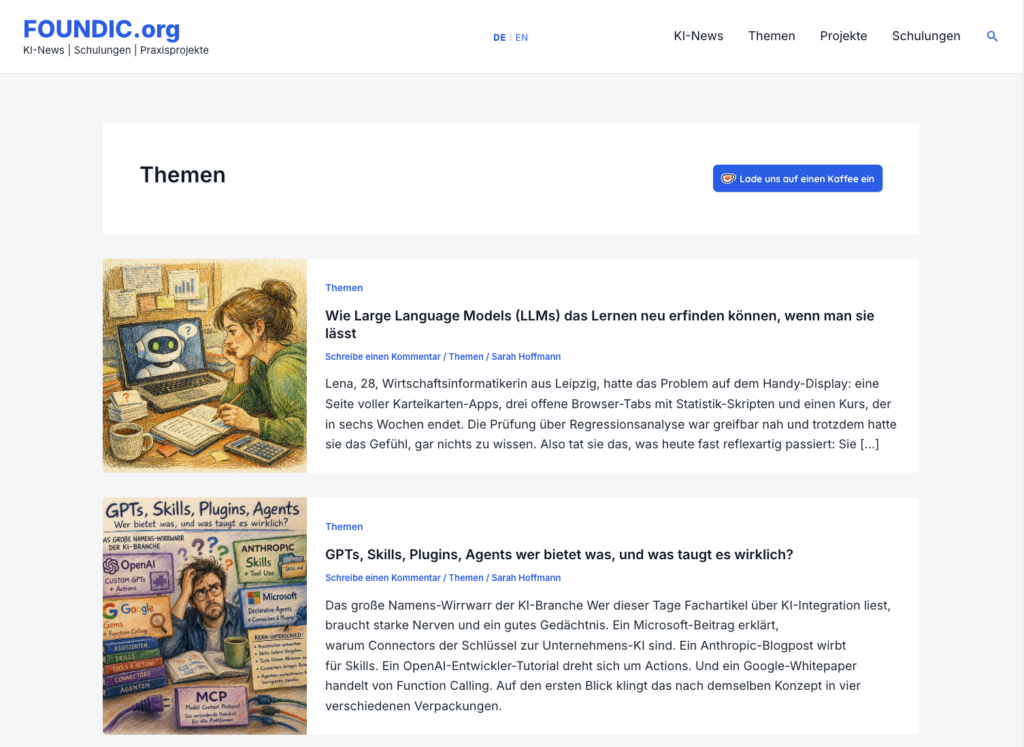
The clever part: because the code checks is_archive() – which covers all WordPress archive and category pages – the button appears automatically on all eight category pages (four German, four English), each with the correct language text. No adding it page by page.
Fact check: WordPress integration at a glance
- Install and activate the Code Snippets plugin (do not edit the theme files directly!)
- Create a new snippet → paste in the PHP code
- The snippet consists of three parts:
- Button function: checks the archive page and the language, loads the Ko-fi library and outputs the button – library and call deliberately sit right next to each other
- CSS function: positions the button right-aligned next to the heading, responsive for mobile
- JavaScript function: moves the button to the right place in the page build after loading
- Activate the snippet → the button appears automatically on all category pages
- Prerequisite for multilingual support: the Polylang plugin installed and configured
- The Ko-fi ID and the colour sit in part 1, directly in the
kofiwidget2.init()call – that is where they are changed, nowhere else
Something to chew on – but careful: Test the snippet on a category page immediately after activating it. Open a category of your WordPress website in the browser. Does the button appear? Does it sit next to the heading? On a smartphone: does it sit below it? If something is not right, deactivate the snippet in the Code Snippets plugin – your website stays fully functional throughout. Bernd would not have been able to do that, because he would have worked directly in footer.php.
Step 7: improve the Ko-fi profile page
Bernd has already uploaded his profile picture – it is a holiday photo from 2019 at a theme park: “I have done that already.”
Tanja: “That is a picture of you in front of a Ferris wheel.”
Bernd: “But it is me.”
Tanja: “It should be your website’s logo.”
Bernd: “…I think people will still recognise me.”
A click on the Ko-fi button on your website takes visitors to your Ko-fi profile page. That page is the first thing a potential supporter sees – and it deserves a little care.
Three changes make the biggest difference:
1. Adjust the display name
Under Settings → Profile set the display name to the full brand name. “FOUNDIC” becomes “FOUNDIC.org” – the name visitors know and trust.
2. Upload a profile picture
The official logo replaces the default Ko-fi avatar. Ko-fi supports the common image formats (PNG, JPG). The image should be square and at least 200 × 200 pixels so that it looks sharp.
3. Set the theme colour
Under Settings → Page you can choose your own accent colour. #2563eb – the FOUNDIC blue – makes the Ko-fi page feel like part of your own brand rather than a generic external page.
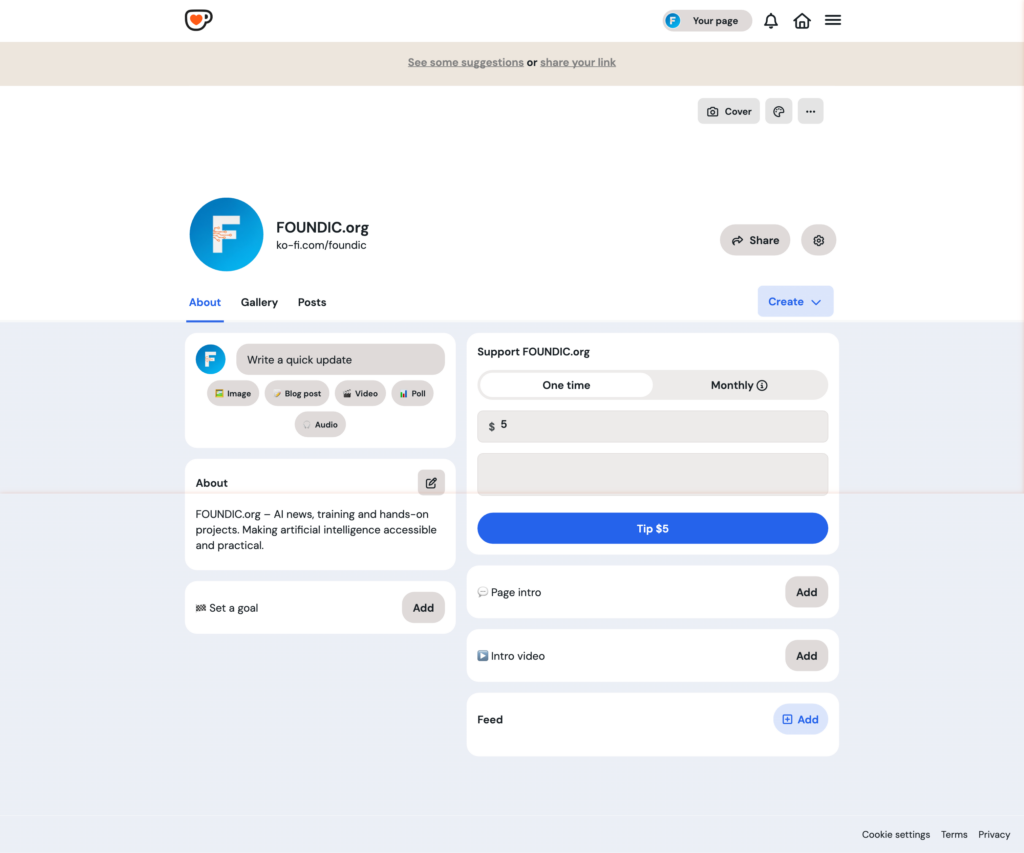
The result: a profile page that looks as if it belongs to the website. No default green smiley, no foreign brand name, no generic Ko-fi standard colour.
If you like, you can add further elements:
- A cover image (banner image at the top of the profile page, recommended size: 1200 × 400 pixels)
- An about text explaining what donations are used for
- A welcome post that fills the page with life and shows that somebody is actually active here
- Google Analytics 4 can be entered in Ko-fi under Settings → Page (field “Google Analytics ID”, format:
G-XXXXXXXXXX) in order to track visitors of the Ko-fi page in your own GA4 property
Fact check: optimising the profile page
- Display name = full brand name (not your first name)
- Profile picture = logo, square, at least 200 × 200 px
- Accent colour = primary colour of your own website (hex code)
- Cover image: optional, recommended 1200 × 400 px
- About text: briefly explain what donations are used for – it creates trust
- Google Analytics: Ko-fi Settings → Page → enter the GA4 measurement ID
Something to chew on: Open your Ko-fi profile page (
ko-fi.com/yourname) in a private browser tab – that way you see it the way a visitor sees it. What strikes you first? Does the name fit? Does the picture fit? As a visitor, would you build trust – or do you look like a half-finished profile? Do three things: name, logo, colour.
Making the button work: text, position and A/B tests
Bernd says: “I have the button everywhere now. Header, footer, sidebar, after every paragraph, as a pop-up…”
Tanja: “And how many donations have you received?”
Silence.
Bernd: “…People still have to get used to it.”
Ulf: “I mean – if the coach asks after every pass whether you fancy buying a shirt, at some point you stop listening.”
That the button works technically is one thing. That it actually generates donations is another. Two adjusting screws have the greatest influence: the button text and the position on the page.
Button text: emotion beats description
The generic Ko-fi text “Support me on Ko-fi” is technically correct and emotionally ineffective. Good button texts combine an emotional component with a concrete benefit – they explain why a donation makes sense, not just that it is possible.
Testable variants in German:
| Variant | Type | Effect |
|---|---|---|
| “Lade uns auf einen Kaffee ein” | Inviting, personal | Likeable, low threshold |
| “Unterstütze unsere Arbeit” | Direct, clear | Serious, but not very emotional |
| “Hilf uns, unabhängig zu bleiben” | Benefit-focused | Explains the value of the donation |
| “Gefällt dir das? Unterstütze uns” | Reactive, conversational | Speaks to the reading moment directly |
Testable variants in English:
| Variant | Type | Effect |
|---|---|---|
| “Treat us to a coffee” | Inviting, vivid | Warm, low threshold |
| “Support our work” | Direct, neutral | Clear, but not very emotional |
| “Keep this project alive” | Urgency, significance | High engagement, but risks pressure |
| “Like what you read? Buy us a coffee” | Reactive, conversational | Ties in with the reading moment |
Recommendation: Start with an emotional, benefit-oriented variant such as “Hilf uns, unabhängig zu bleiben” (DE) or “Keep this project alive” (EN). Switch to a different variant after 4–6 weeks and compare the click rate in Google Analytics. This is no black magic – this is systematic testing.
Positioning: where the button sits decides the conversion
Conversion describes the moment a visitor performs a desired action – in this case: clicks the button and donates. Studies on creator platforms allow a clear hierarchy to be derived:
| Position | Conversion effect | Recommendation |
|---|---|---|
| End of article | ★★★★★ Highest conversion | Mandatory – readers are most engaged here |
| Floating button | ★★★★☆ High, but risky | Only use it if it can be dismissed |
| After 2/3 of the article | ★★★★☆ High | Good for long articles (>1,500 words) |
| Archive pages | ★★★☆☆ Medium | Good for returning readers – as implemented on foundic.org |
| Sidebar | ★★☆☆☆ Medium | Often ignored (so-called “banner blindness”) |
| Header | ★☆☆☆☆ Low | Too early – readers have not read anything yet |
Concrete recommendation for WordPress:
- End of article → highest priority. In WordPress add it via the Code Snippets plugin using the
the_contenthook, or directly in the theme template - Archive pages → already implemented (as described in step 6)
- After 2/3 of the article → optional, for very long articles, achievable with the “Advanced Ads” plugin or a custom shortcode
Fact check: conversion optimisation
- Button text: emotion + benefit combined > generic
- A/B test: change only one variable at a time, measure for at least 4 weeks
- Positioning: end of article first, then archive pages, then optionally floating
- Floating button only with a close option – otherwise reading time drops instead of the bounce rate
Something to chew on: Write down three different button texts for your website – a factual one, an emotional one, a benefit-focused one. Start with the emotional one. In four weeks you will know which works better.
Conclusion: small, but effective
Ulf leans back: “So, briefly summarised: I sign up, connect PayPal, build a button, put the code into this snippet thing, and then the button sits on all category pages automatically?”
Tanja: “Exactly.”
Ulf: “That is… actually not that bad.”
Bernd: “I would have done it in ten minutes.”
Tanja: “And your website would have crashed twice, you would have written ‘Buy me a Coffee’ on it – which is a registered trademark – and the button would have had the same text on every page, whether German or English.”
Silence.
Bernd: “But in ten minutes.”
What stands at the end of a day in April: a fully working donation button on a WordPress website. Integrated without dangerous interventions in theme files, without trademark problems, language-aware for two languages, in the primary colour of the website itself.
Here is the whole route at a glance once more:
- Platform choice: pick Ko-fi – 0 % platform fee, PayPal + Stripe
- Button text: formulate your own wording – clean in trademark terms
- Create the Ko-fi account: username = brand name, fill in display name and bio
- Confirm the email and connect a payment method (PayPal, Stripe or both)
- Configure the button: adjust text and colour in the widget builder, copy the embed code
- WordPress integration: use the Code Snippets plugin, insert the PHP snippet with button, CSS and JavaScript, activate it
- Improve the profile page: logo, name, colour, cover image, about text
The technical effort was manageable. The conceptual groundwork – comparing platforms, checking trademark law, finding the wording – took more time than the implementation itself. That is usually the case. And usually right, too.
Outlook: what comes after the first button?
The button is in place. PayPal is connected. The first coffee can theoretically be ordered. What now?
Tanja would say: “Wait four weeks. Look in Google Analytics to see which pages the clicks on ko-fi.com/foundic come from. The page with the most clicks gets a button next – right at the end of the article.”
Ulf would nod: “Like video analysis after the match. First look at what happened. Then adjust the tactics.”
Bernd would by now have removed the button from 40 of the 47 pages again, because “the conversion rate is not right”. He has been using the phrase “conversion rate” since lunchtime today.
The next sensible steps after this guide:
- Add the button at the end of the article – the position with the highest conversion, not yet implemented
- Evaluate the Google Analytics data – which pages generate Ko-fi clicks?
- A/B test the button text – four weeks per variant, then compare
- Add Stripe – for readers without a PayPal account
Data only comes once you begin. And then look at what happens.
For the button to appear in both language versions, the site has to be set up bilingually: Making WordPress Bilingual – Polylang DE/EN Step-by-Step Guide.
Whether anyone sees the button at all is only answered by measurement — Who’s Actually Reading? Setting Up Google Analytics 4 on WordPress shows how to set it up.
FOUNDIC.org is ad-free and has no paywall. If this guide helped you:  Treat us to a coffee